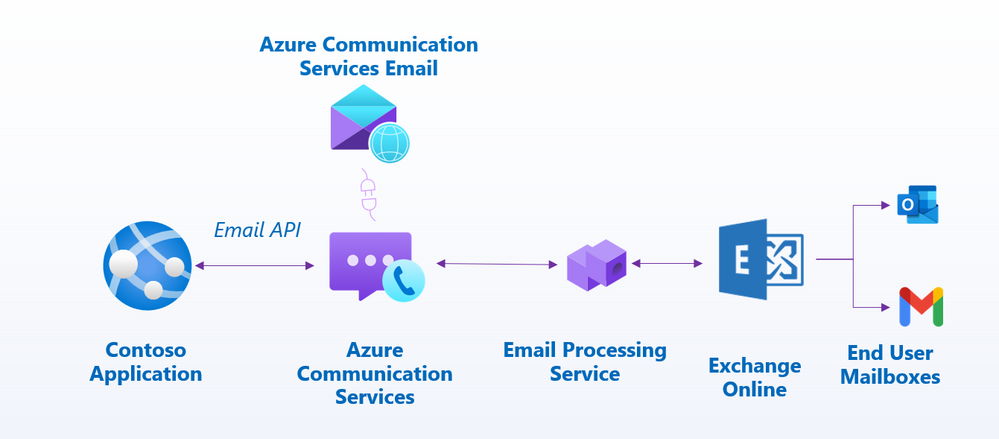
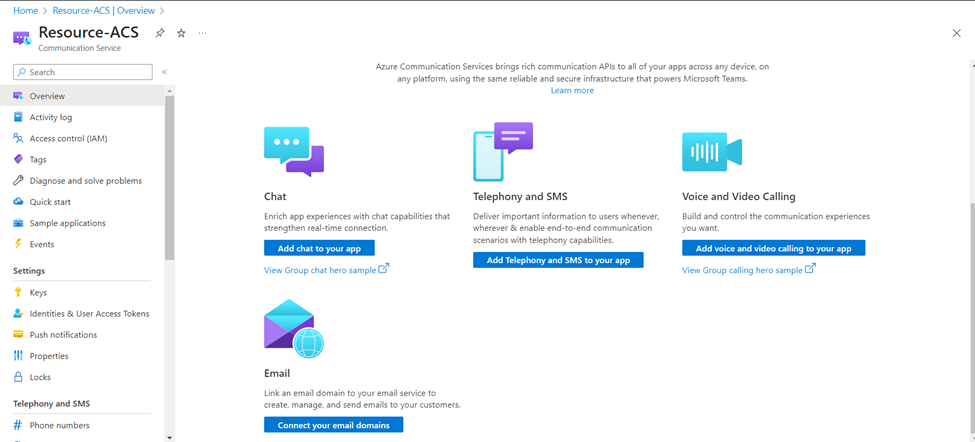
Azure Communication Services is a cloud-based platform that enables you to integrate real-time communication features into your applications. It provides APIs and SDKs to help you to integrate communication into your applications. With cross-platform support, end-to-end encryption, and scalable infrastructure, Azure Communication Services simplifies the process of adding communication capabilities to applications, enhancing user engagement and collaboration.
Azure Communication Services supports various communication formats:
- Voice and Video Calling
- Rich Text Chat
- SMS
Email in Azure Communication Services is a new primitive that facilitates high volume transactional, bulk and marketing emails on the Azure Communication Services platform. It is the most awaited one from Microsoft as a bulk emailing solution.
In this article, I will guide you setting up and sending emails with Azure Email Communication Services.
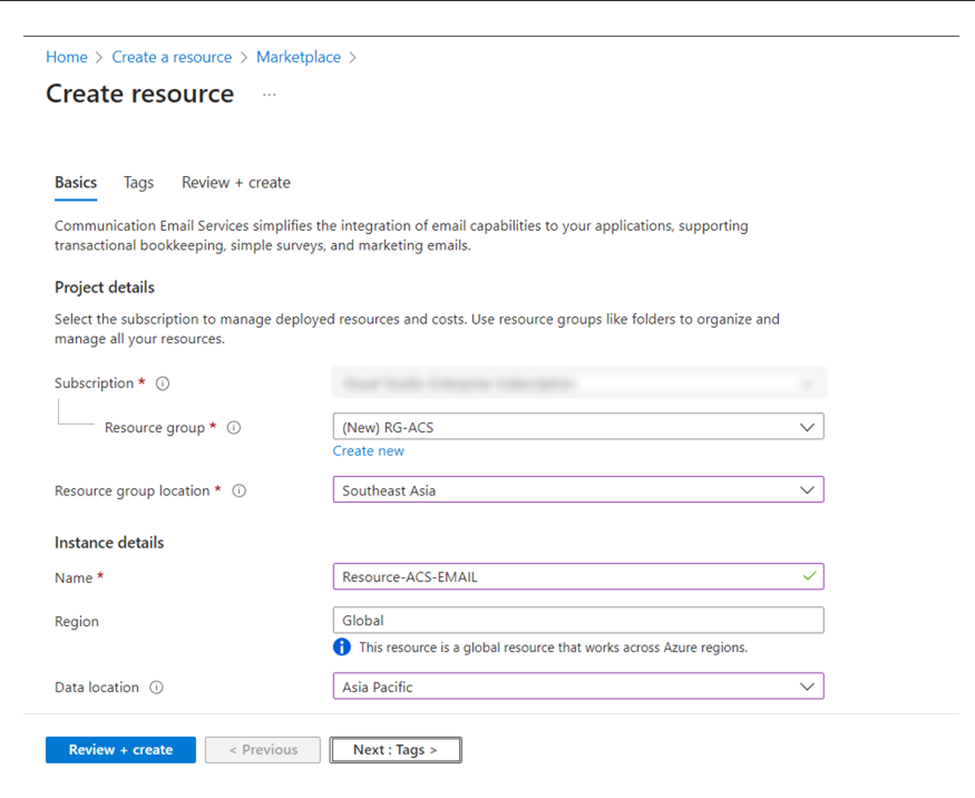
Step 1: Create the Email Communication Service Resource using Azure Portal
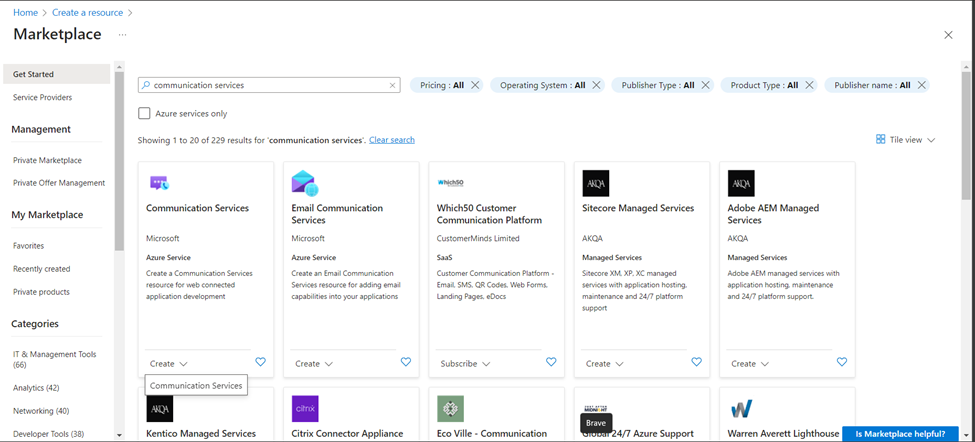
1. Log in to your Azure Portal. Under Azure services, select Create a resource.

2. Search for the Email Communication Services and select create.
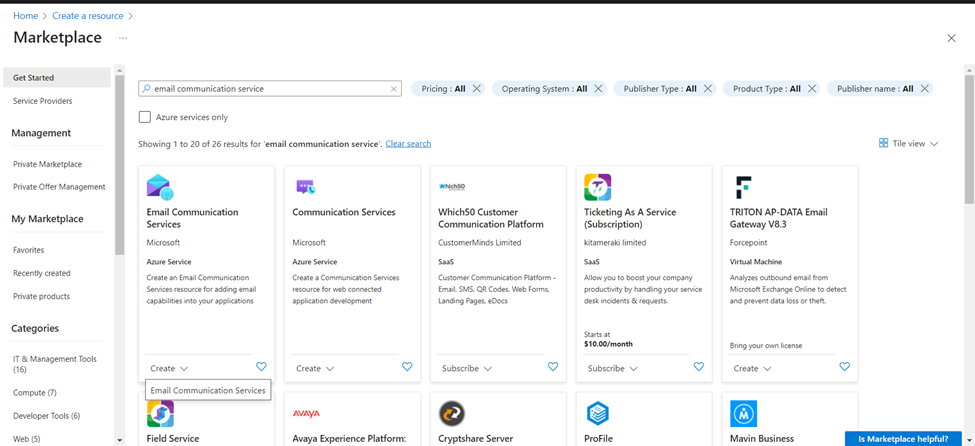
[Note: You can also directly search for the Email Communication Services in Azure Portal Home page.]
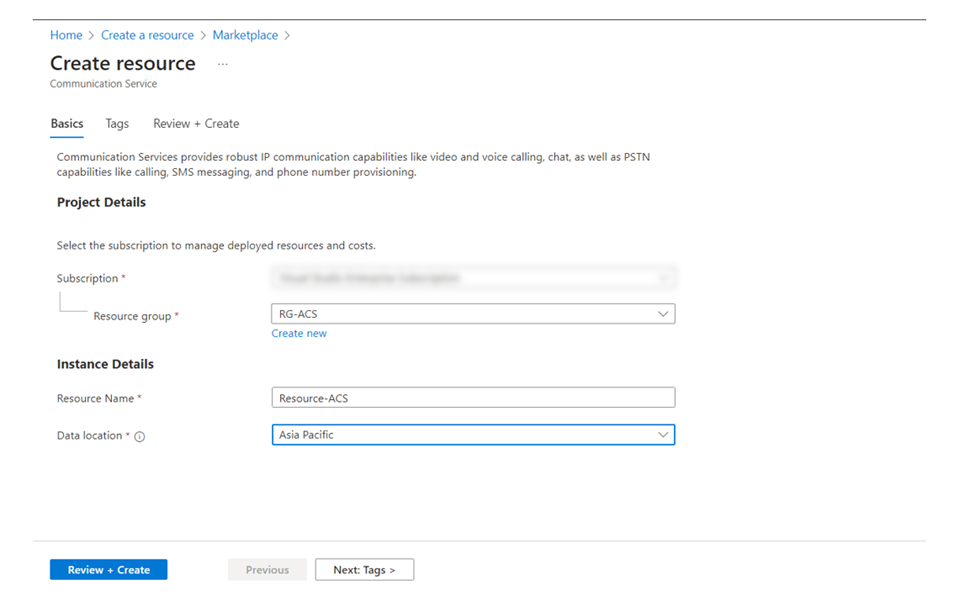
3. In the Create resource page, complete the required information in the basic tab:
- Select your Azure Subscription
- Select an existing Resource Group or create a new one by clicking the Create new option.
- Provide a name for the resource.
- Select your preferred Data location.
- If you would like to add tags, click Next: Tags.
- Then click on Review + create.
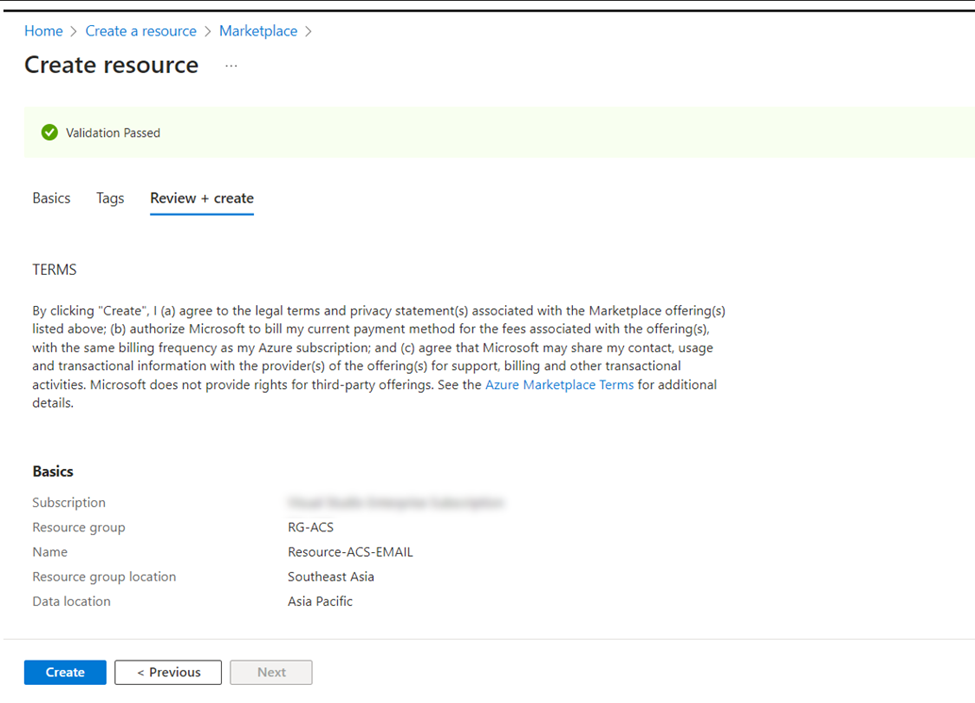
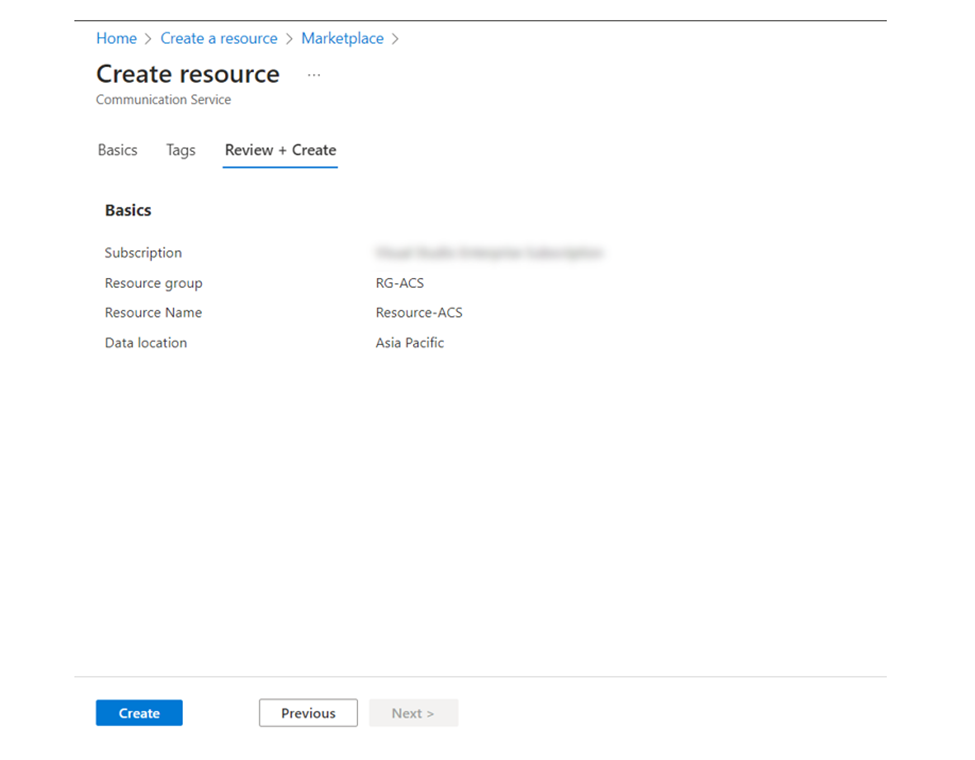
4. Wait for the validation to pass and click Create.
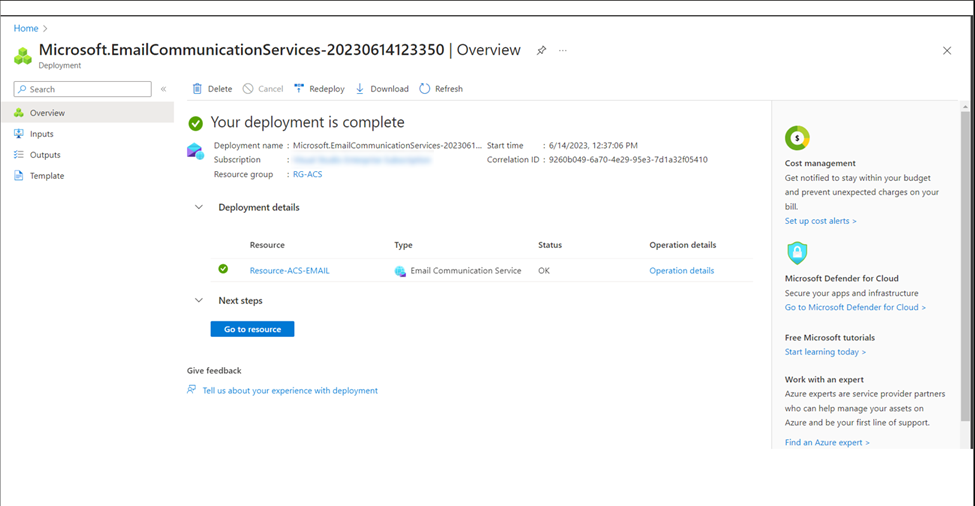
5. It will take some time to complete the Deployment. After the deployment is complete, click Go to Resource to access the Email Communication Service Overview page.
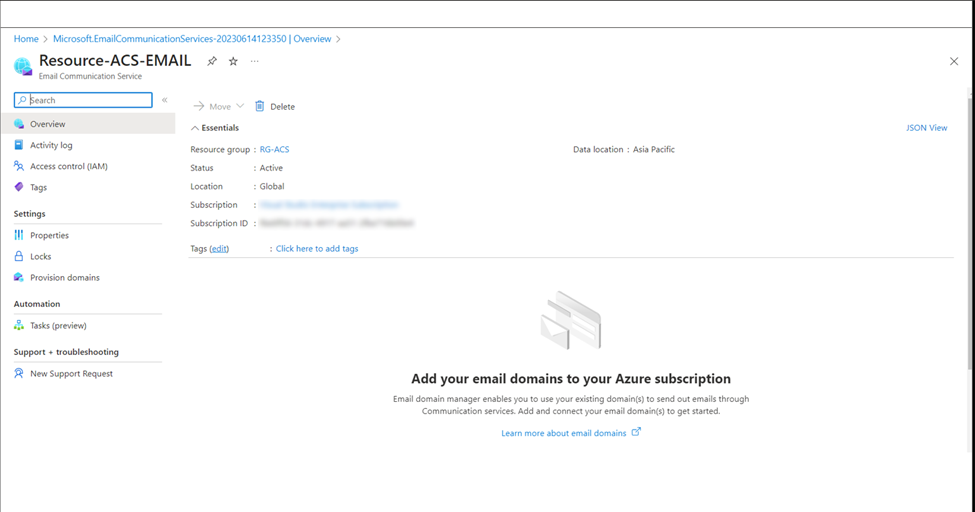
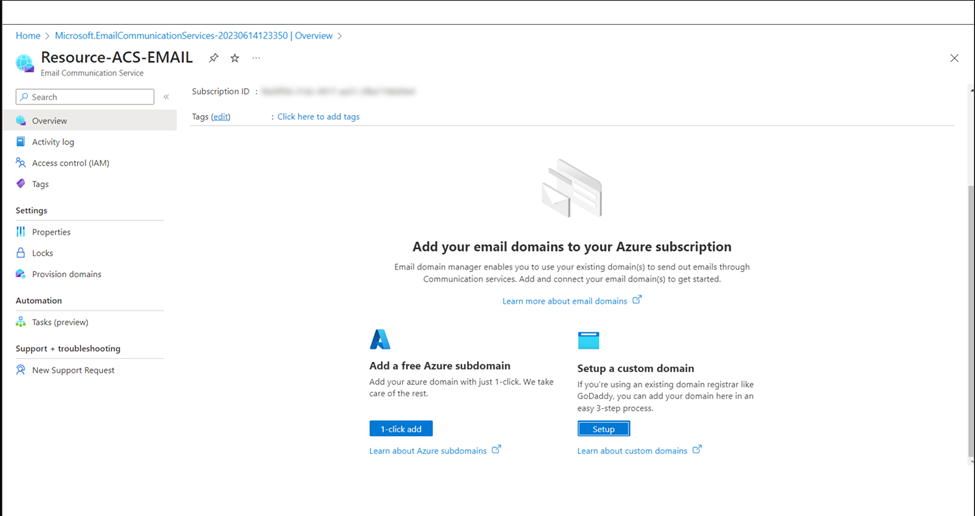
Step 2: Add Custom Domain to Email Communication Service
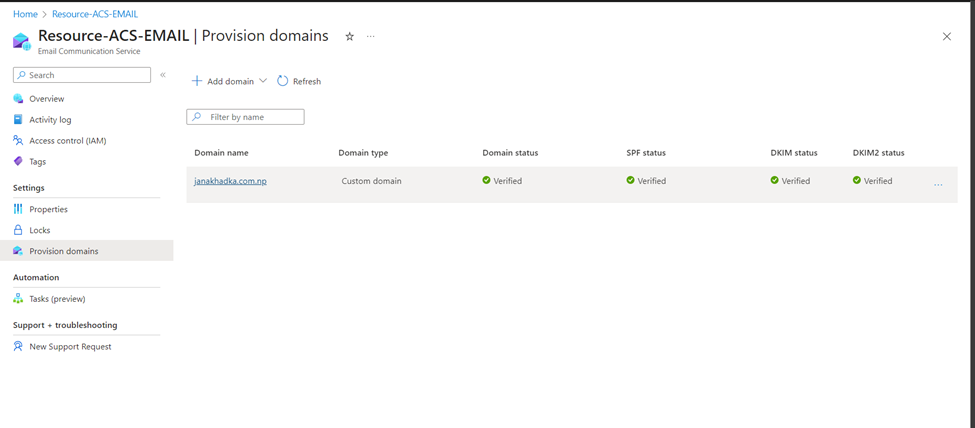
1. To add your custom domain, you can find the Setup a custom domain option in your Email Communication Service overview page. You can also add the custom domain from the Provision domains section from the left pane.
[Note: You can also use free Azure Subdomain to send email you don’t have your custom domain.]
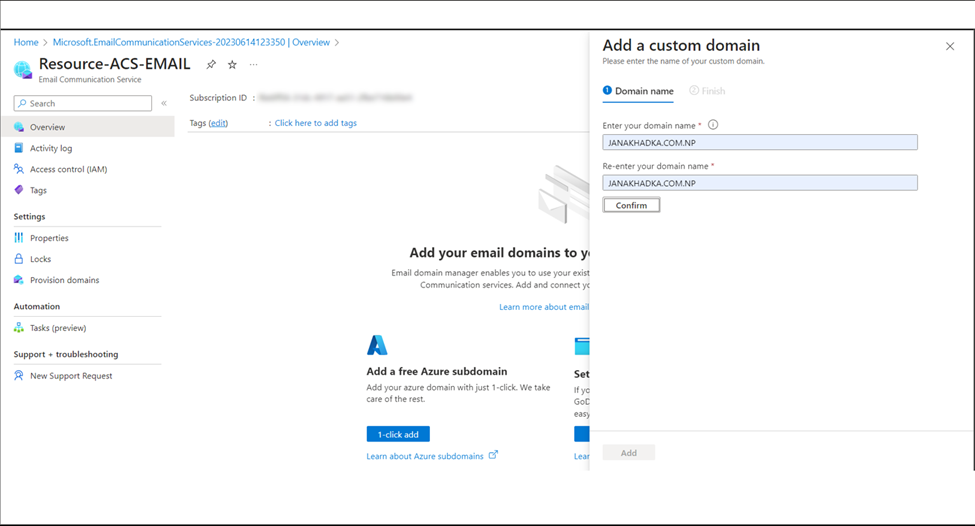
2. Enter your Domain Name in the Enter your domain name and re-enter your domain name section and click on Confirm.
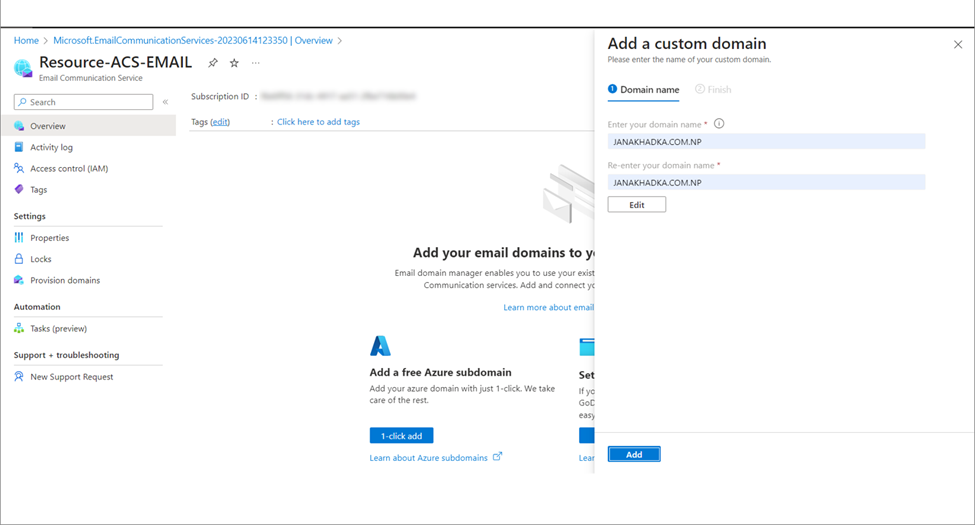
3. Then click on Add.
4. It will take a few seconds to finish the custom domain configuration. Once it is completed, you need to verify your domain ownership. Click on Verify.
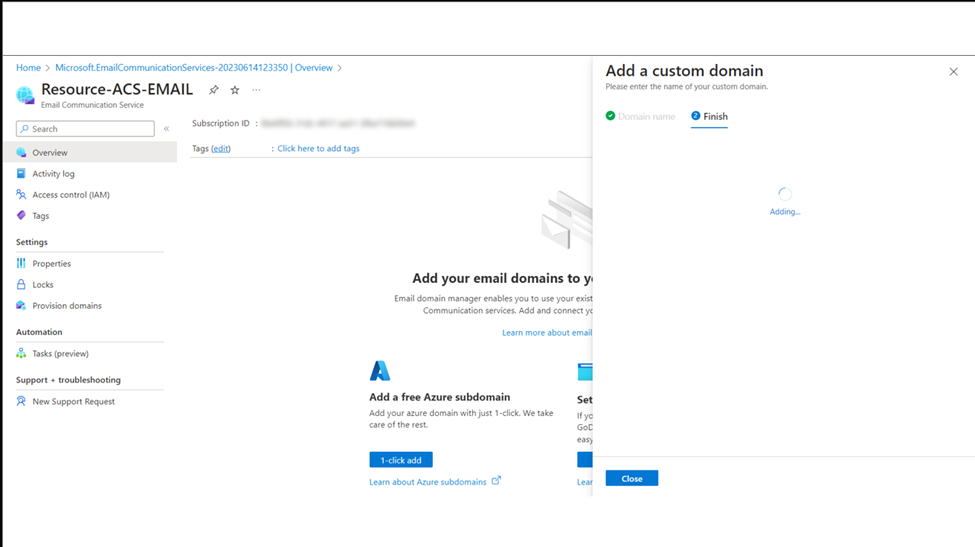
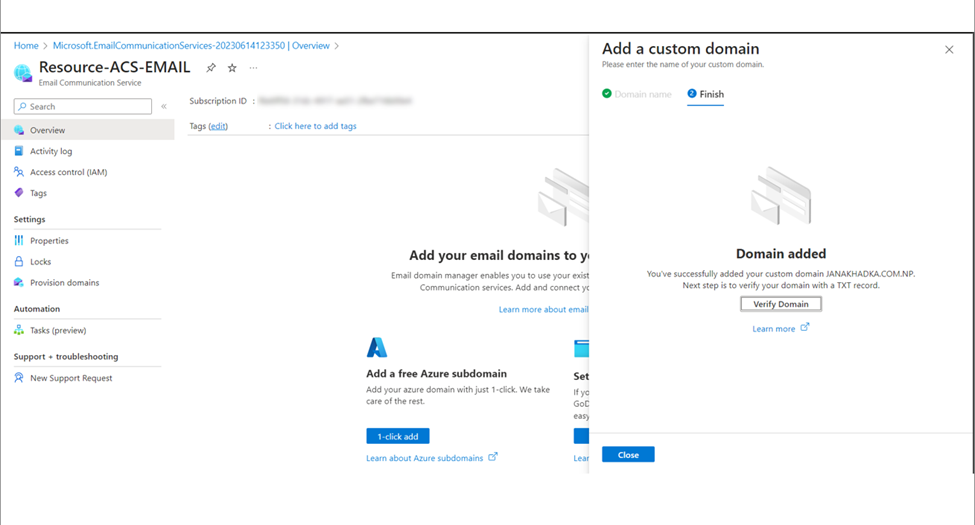
[Note: If you would like to resume the verification later, you can click Close and resume the verification from Provision Domains by clicking Configure later.]
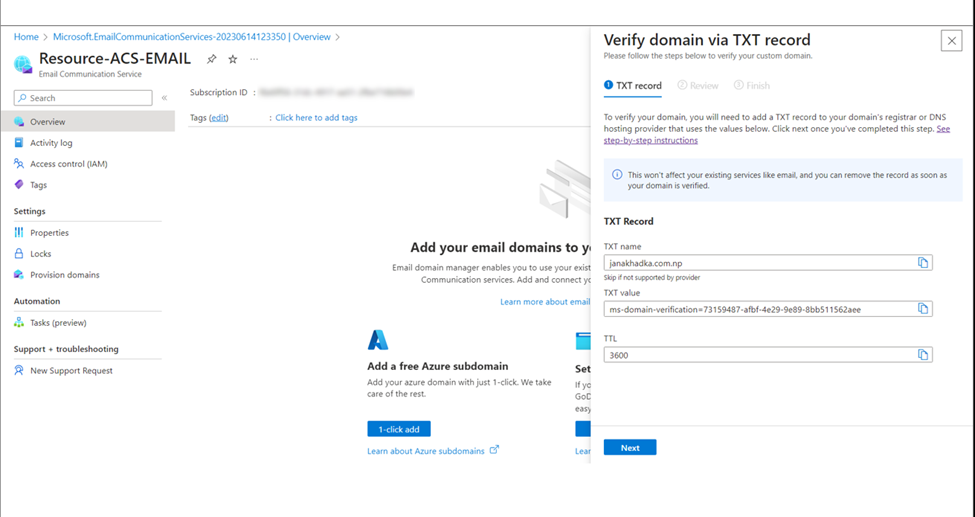
5. It will navigate you to the Verify domain via TXT record page and give you TXT record details. You need to this TXT record to your Domain’s DNS hosting provider.
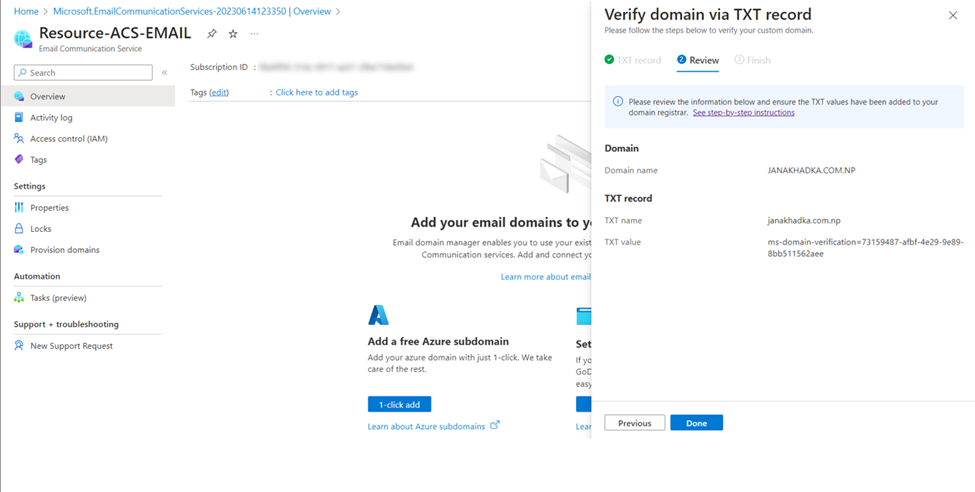
Once the record addition is done, click on Next and then Done.
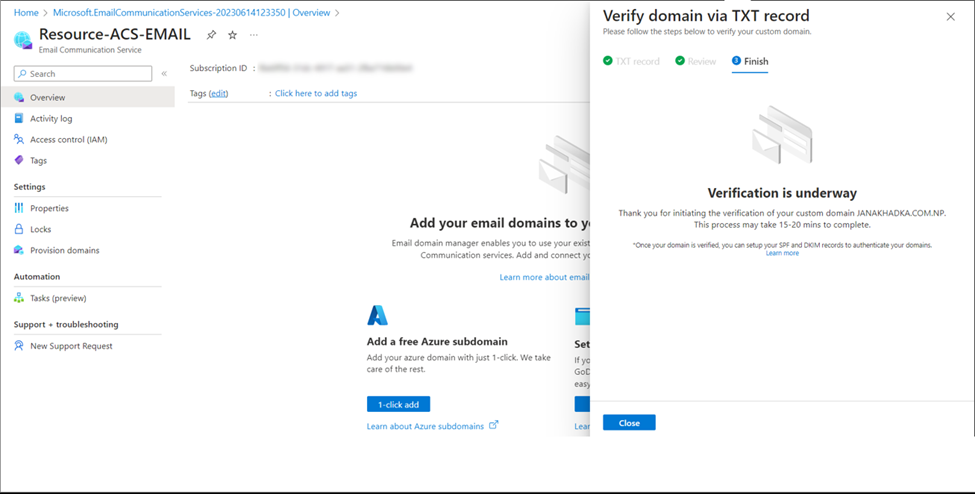
6. It will take some time to reflect the DNS changes. Click on Close.
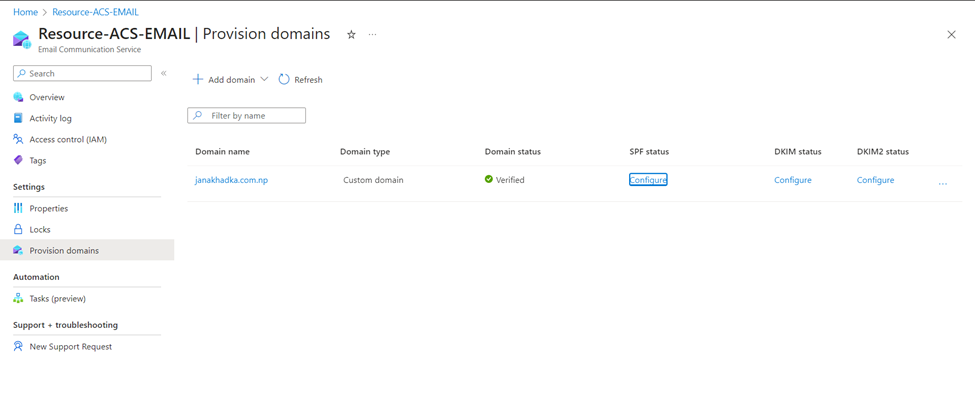
Step 3: Configure Sender Authentication for Custom Domain
Once your domain is verified, you now need to add your SPF and DKIM records to authenticate your domains in Azure Email Communication Service.
1. The Provision domains page will show you the Domain status Verified and will show you the options to Configure SPF and DKIM. Click on Configure.
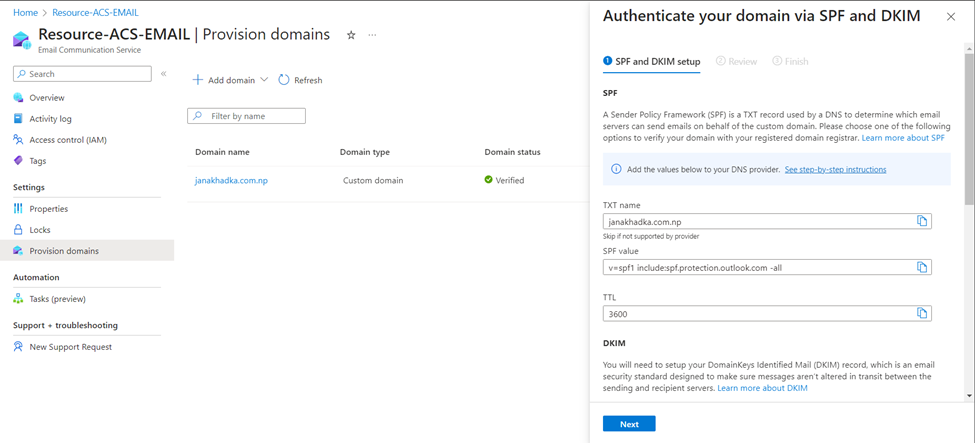
2. The next page will provide you with the details of a TXT record and two CNAME records for SPF and DKIM authentication. Once the records have been added to your DNS, click on Next.
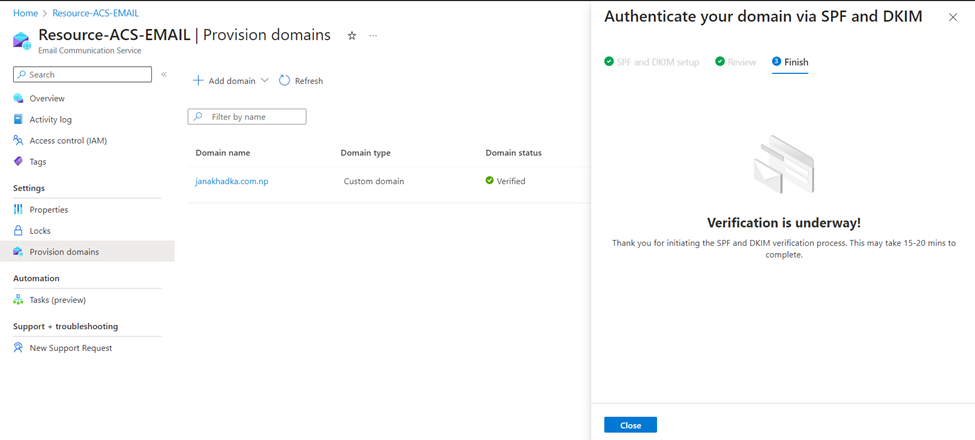
3. Verify the TXT and CNAME records addition and click on Done.

4. It will take some time to update your DNS changes. Click on Close to complete the configuration.
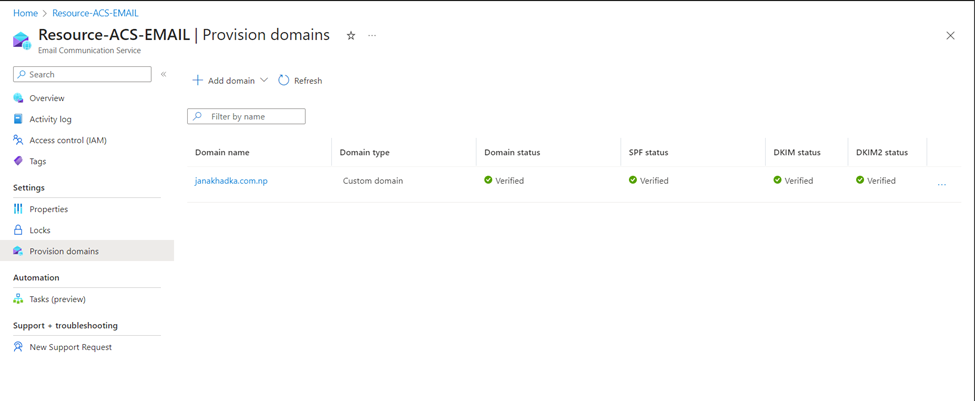
5. Once your sender authentication configurations are successfully verified, your email domain is ready to send emails using custom domain.
Step 4: Changing Sender Name and Email Address for Custom Domains
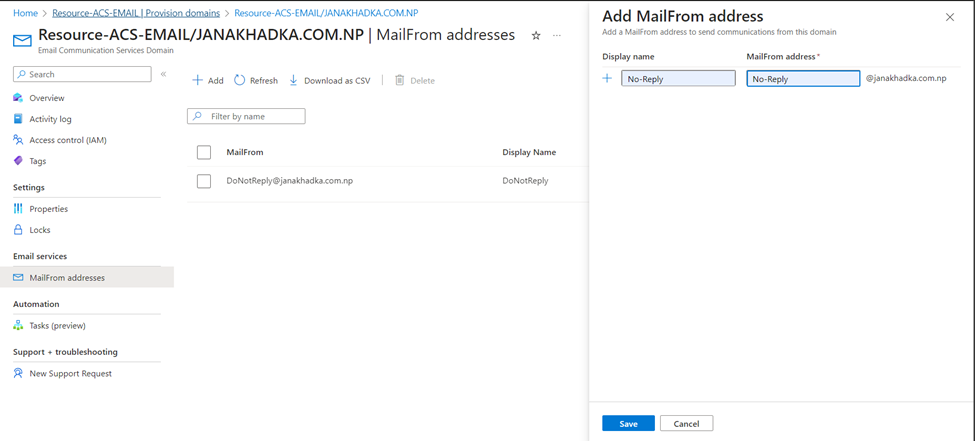
By default, there will be a sender configured for your custom domain as DoNotReply. You can add your MailFrom address something other than this default one and also more than one sender.
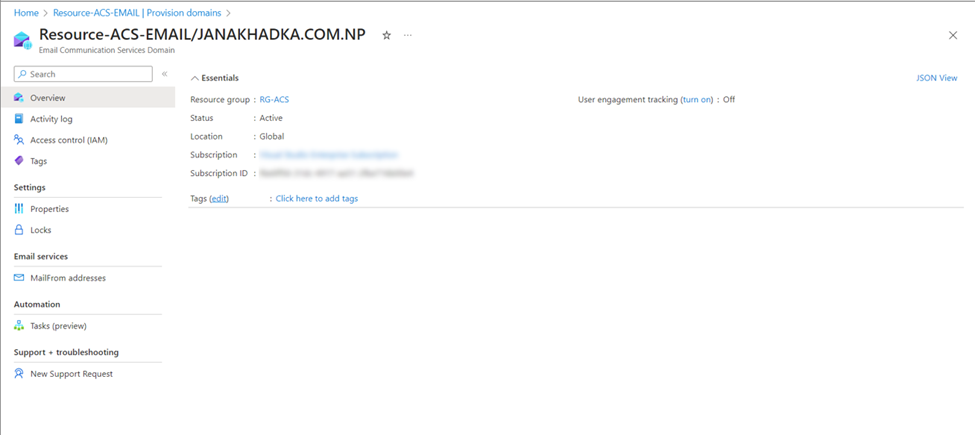
1. In the Provision domains section of your Email Communication Service resource, click on your provisioned domain. It will navigate you to the Domain Overview page. Click on MailFrom Addresses link in left navigation.
2. You’ll see the default DoNotReply in the MailFrom address lists. Click on Add.

3. Enter the Display Name and MailFrom address and click on Save.
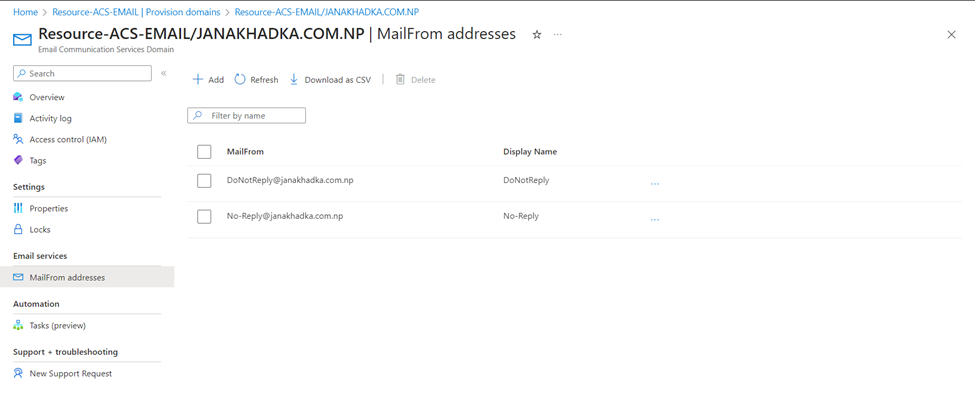
4. Now you’ll see the updated list with newly added MailFrom address on the list.
Step 5: Create an Azure Communication Services Resource
1. Log in to your Azure Portal. Under Azure services, select Create a resource.

2. Search for the Communication Services and select create.
[Note: You can also directly search for the Communication Services in Azure Portal Home page.]
3. In the Create resource page, complete the required information in the basic tab:
- Select your Azure Subscription
- Select an existing Resource Group or create a new one by clicking the Create new option.
- Provide a name for the resource.
- Select your preferred Data location.
- If you would like to add tags, click Next: Tags.
- Then click on Review + create.
4. Wait for the validation to pass and click Create.
5. It will take some time to complete the Deployment. After the deployment is complete, click Go to Resource to access the Email Communication Service Overview page.
Step 6: Connect your email domain to the Communication Service Resource
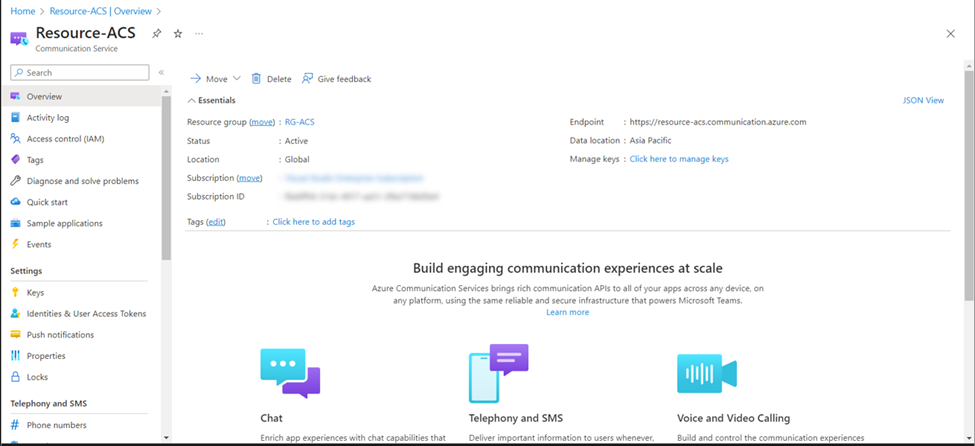
1. In the Azure Communication Service Resource overview page, you’ll find the option to connect your Email Domains under the Email section. Alternatively, you can also connect your Email Domains from the Domains tab on the left navigation panel, specifically under the Email option.
Click on Connect your email domains OR Connect domain.
OR

2. Select your verified domains by filtering: Subscription, Resource Group, Email Service, Verified Domain.
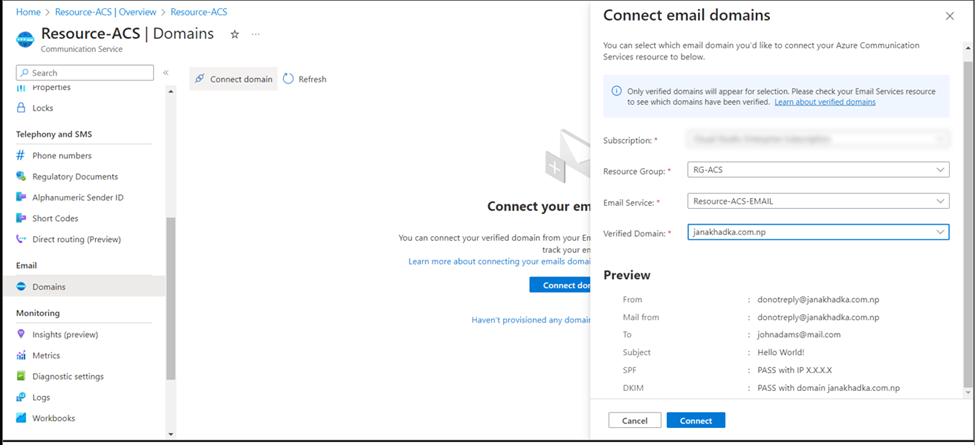
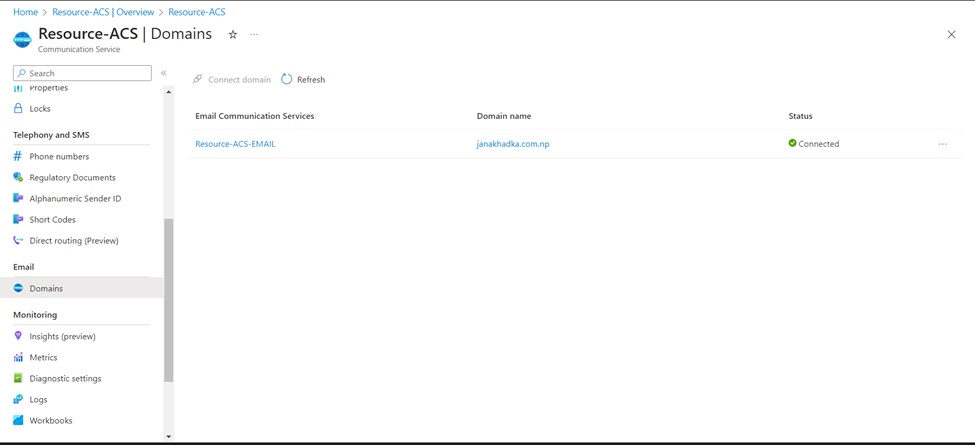
3. Click on Connect. Your Email Domain is now connected to the Azure Communicate Service Resource.
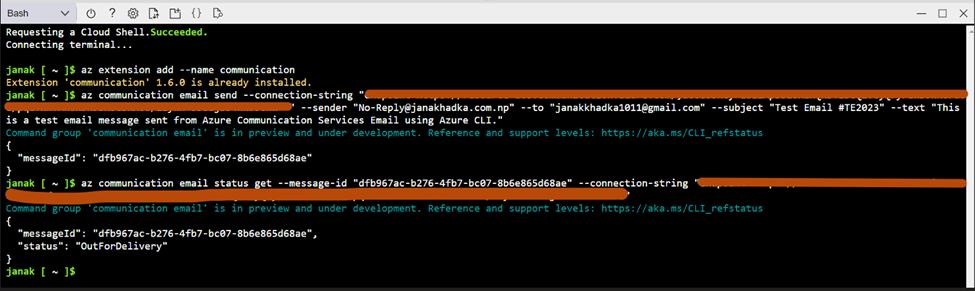
Step 7: Send an Email using Azure Communication Service using Azure CLI
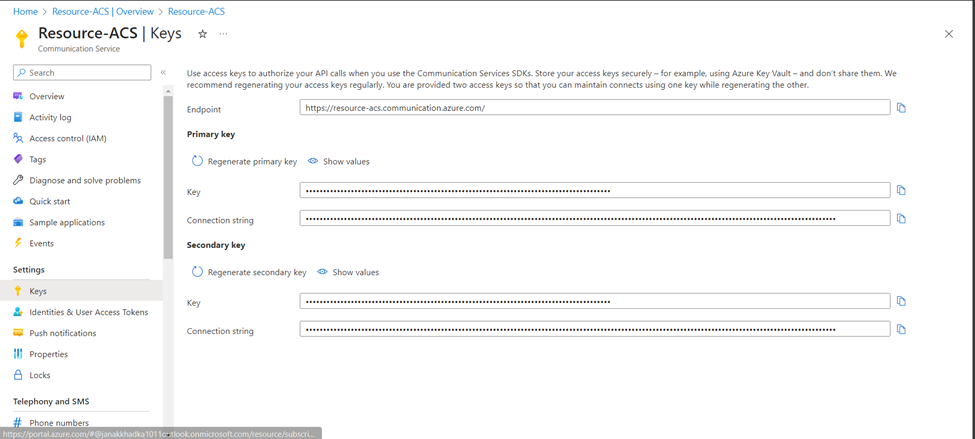
1. In the Azure Communicate Service Resource, you can find the Connection String from the Settings tab in the left navigation panel, under Keys section. This will require later in Azure CLI.
2. Sign into your Azure CLI.
3. Add the Azure Communication Services extension for Azure CLI by using the following command if you’ve not added previously (this is one time addition).
- az extension add –name communication

4. Send an email message using the following Azure Cloud Shell command.
- az communication email send –connection-string “<Connection String>” –sender “No-Reply@janakhadka.com.np” –to “janakkhadka1011@gmail.com” –subject “Test Email #TE2023” –text “This is a test email message sent from Azure Communication Services Email using Azure CLI.”
5. You can check the status of the email delivery by using following command:
- az communication email status get –message-id “dfb967ac-b276-4fb7-bc07-8b6e865d68ae” –connection-string “<Connection String>”
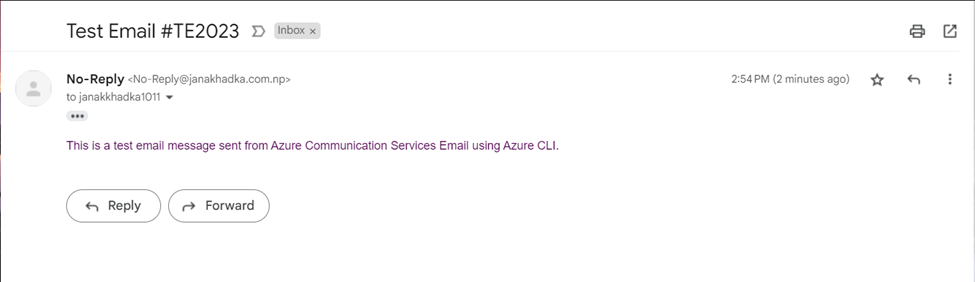
The received Email:
Similarly, you can send emails using Azure Communication Service Email using other programming languages in different Applications as well.
Er. Janak Khadka