Welcome back, courageous migrators! If you’ve journeyed with us through Part-1 of our Complete Guide to Hyper-V VMs to Azure Migration, you’re well on your way to mastering the art of seamless cloud transition. We’ve laid the groundwork, conquered replication, and now it’s time to dive into the exhilarating conclusion of this migration.
In this part, we’ll unlock the secrets to overseeing your migration’s progress, ensuring the stability of your VMs through thorough testing, and executing the grand finale: the live migration to Azure. This chapter is all about making sure your migration is not just successful, but smooth, reliable, and ready to shine in the cloud.
Without further ado, let’s delve into the remaining steps that stand between you and a triumphant Hyper-V VMs migration to Azure:
Step 4: Track and Monitor Replication Progress
As you click on the Replicate option in the previous step, it sets off the Start Replication job, prompting the migration of your machines to Azure. Once this initial job is successfully completed, your systems launch their initial replication process to Azure.
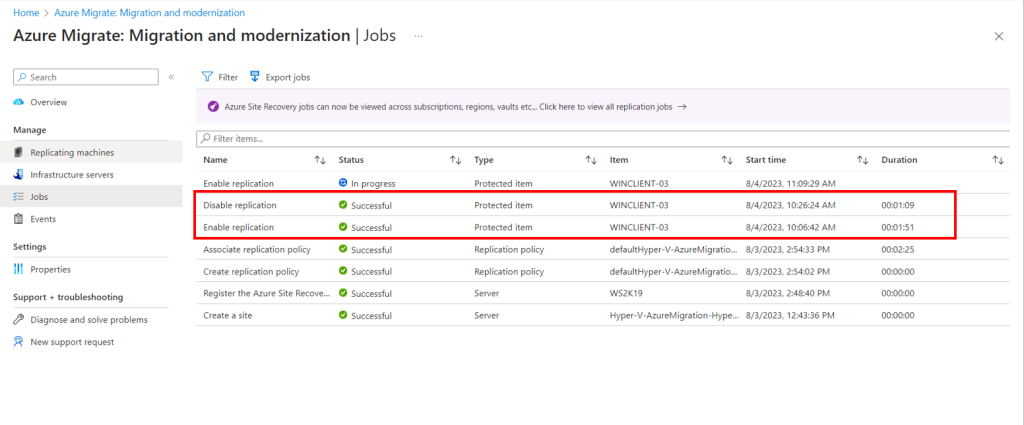
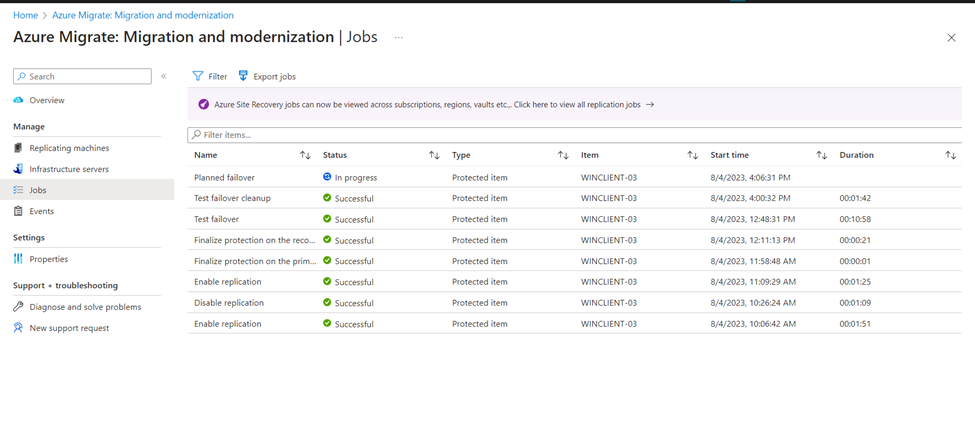
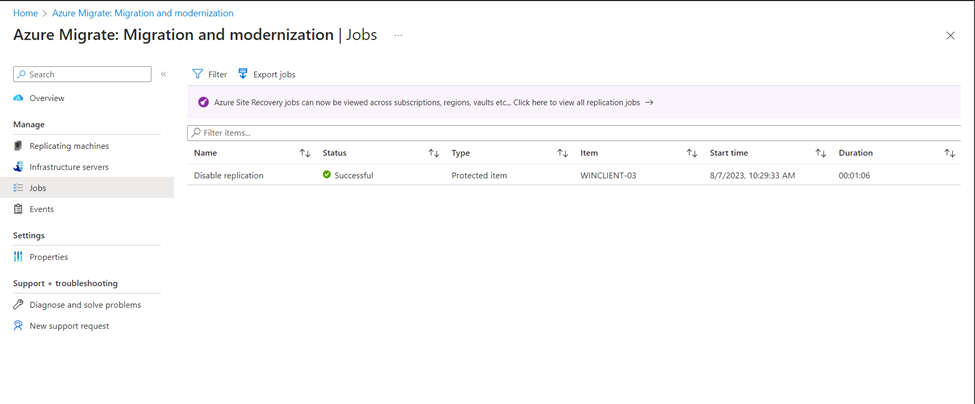
You can monitor replication status by clicking on Replicating machines and Jobs in Migration and modernization tool.
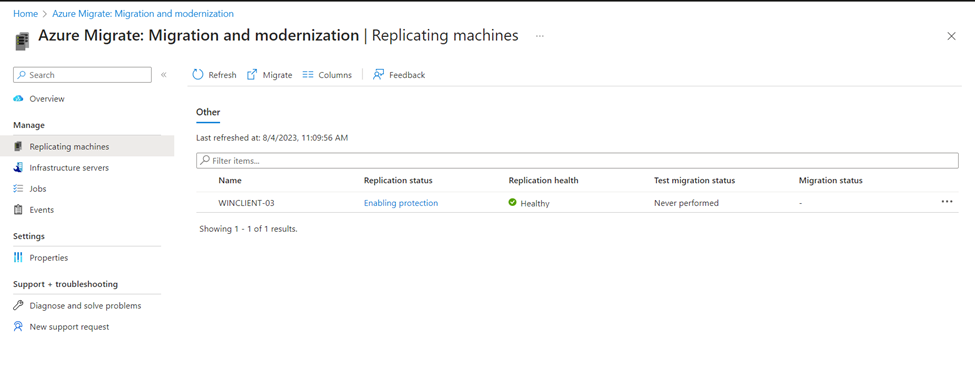
In my case, note the highlighted section showing Enable and Disable replication status. As I initially disabled replication, these options became visible. Keep in mind, during your first interaction with the interface, you might not see them immediately.
Clicking on the Enable replication job will show you the more details:
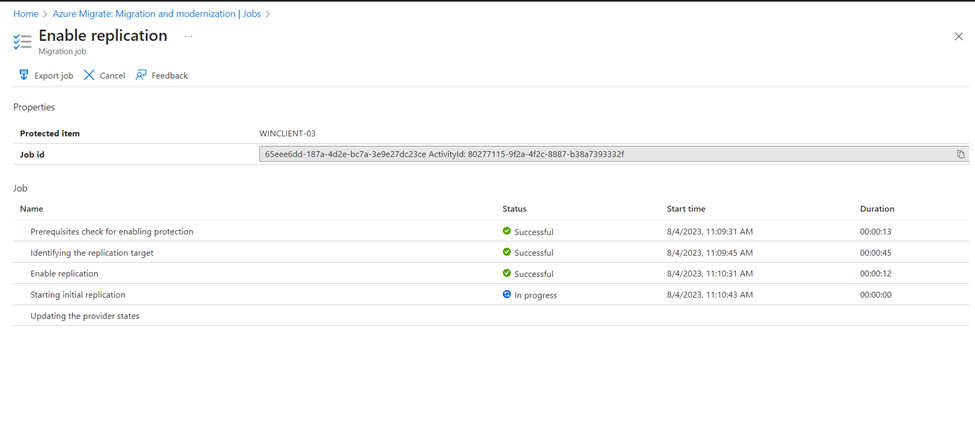
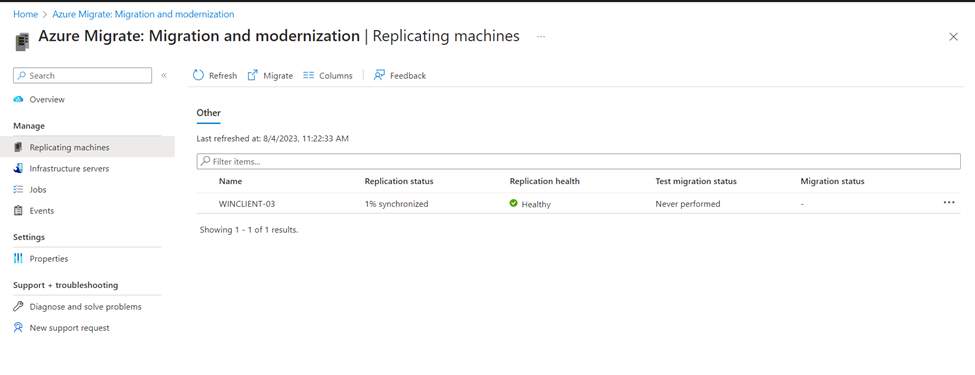
Once the initial replication starts, the Replication status will be changed to % of synchronized as shown below.
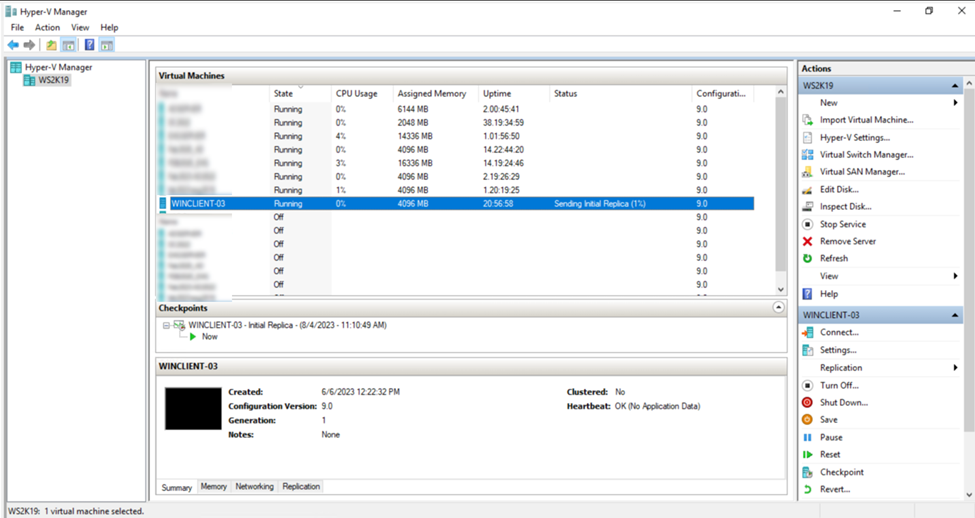
At the same time, you will also see the VM status in your Hyper-V Server as Sending Initial Replica with % of replication.
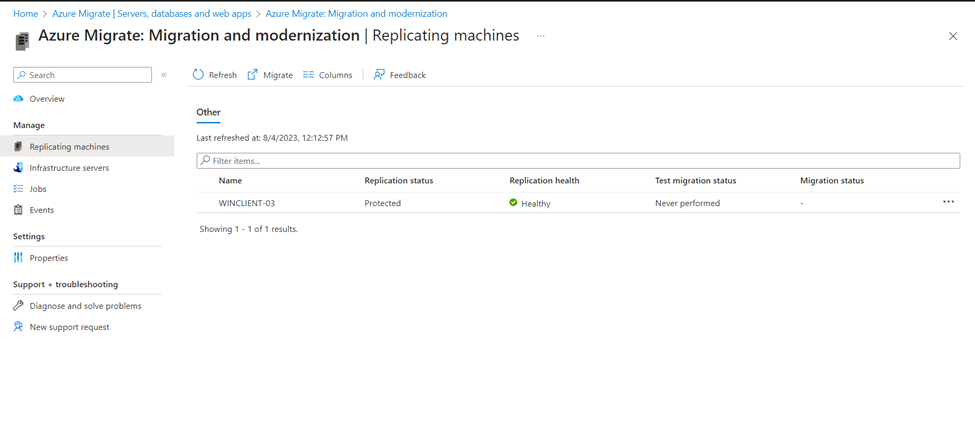
Once the initial replication process finishes, the Replication status will be changed to Protected and delta replication of your VMs starts in backend. The delta replication continuously replicates the incremental changes whenever occurred in on-premises VMs to Azure.
Step 5: VMs Test Migration
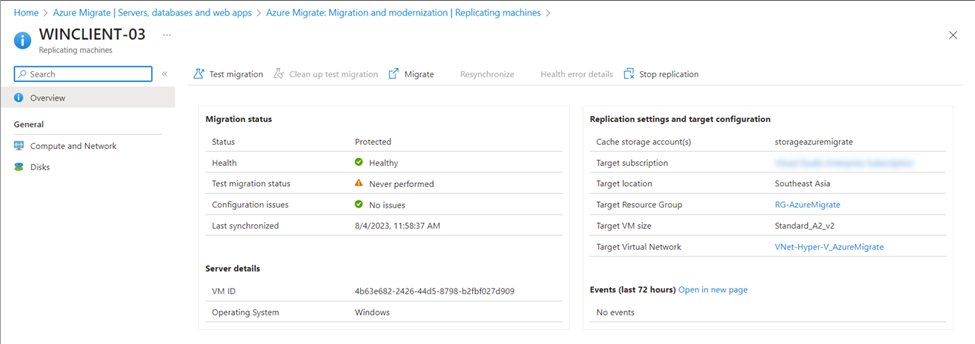
When the initial replication finishes, you can now migrate the VM to Azure. There will be two options available for Replicated machines: “Test migration” and “Migrate”, when you click on Three Dots in the right.
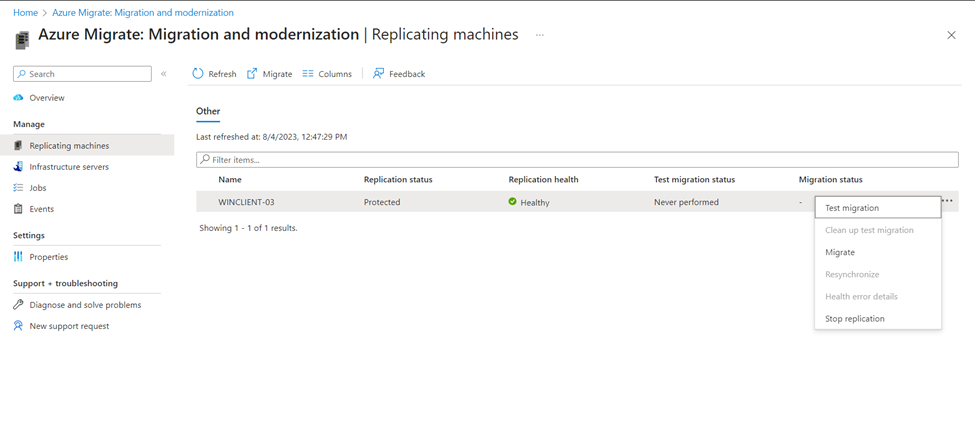
Also, you can see the same options when you click on the replicated machine name from Replicating machines section under Migration and modernization tool.
While you have the flexibility to choose between these two options for performing the operation, it is strongly recommended to conduct a test migration at least once for each replicated machine before proceeding with the migration to Azure.
Conducting a test migration involves verifying that the migration process functions as intended, all the while ensuring that the on-premises machines remain fully operational and continue their replication processes without any disruption. The Test migration simulates the migration by creating an Azure VM using replicated data. The duplicated Azure test VM can be employed to verify the migration, carry out application testing, and tackle any issues proactively before proceeding with the entire migration process.
To perform the Test migration, follow these steps:
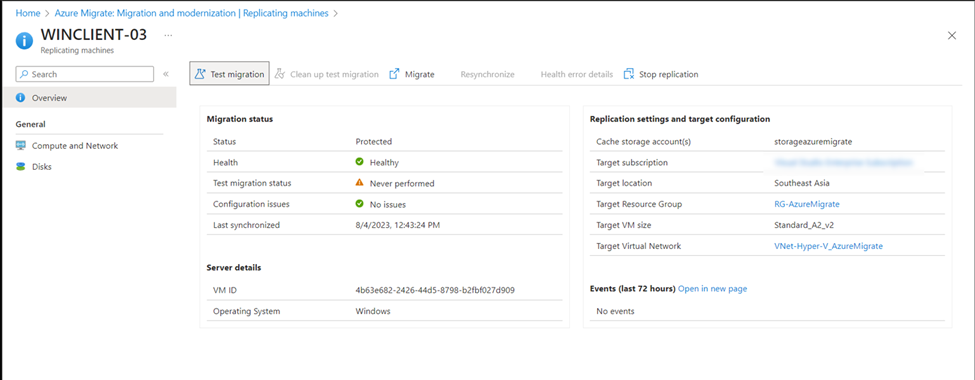
1. In Azure Migrate: Migration and modernization | Replicating machines section, on your replicated machine’s Overview page, click on Test migration.
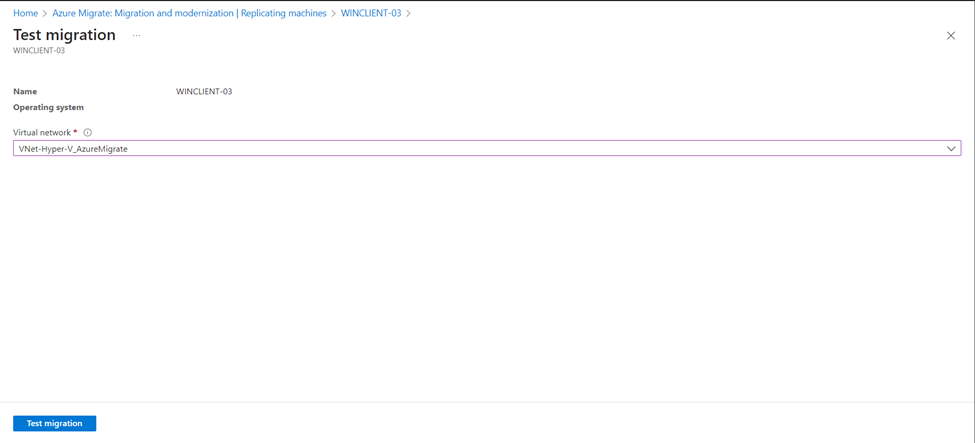
2. In Test migration page, select the Virtual network where you want to locate your Azure VM after migration. It is advised to opt for a virtual network that is not intended for production usage. Click on Test migration to proceed.
3. The Test migration job will start. You can see the status in portal notification.
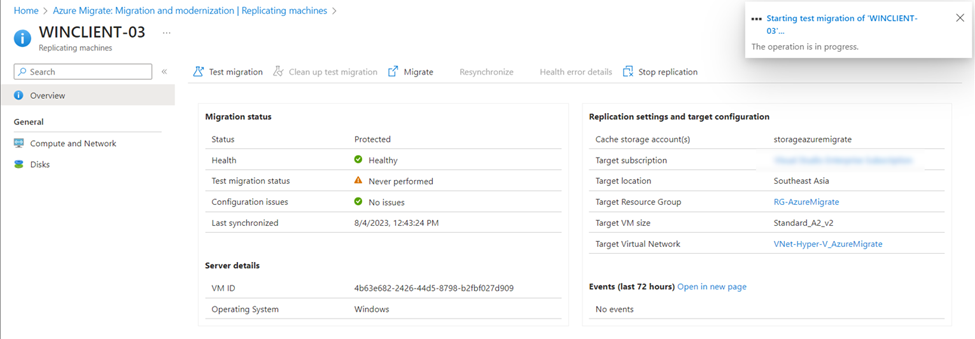
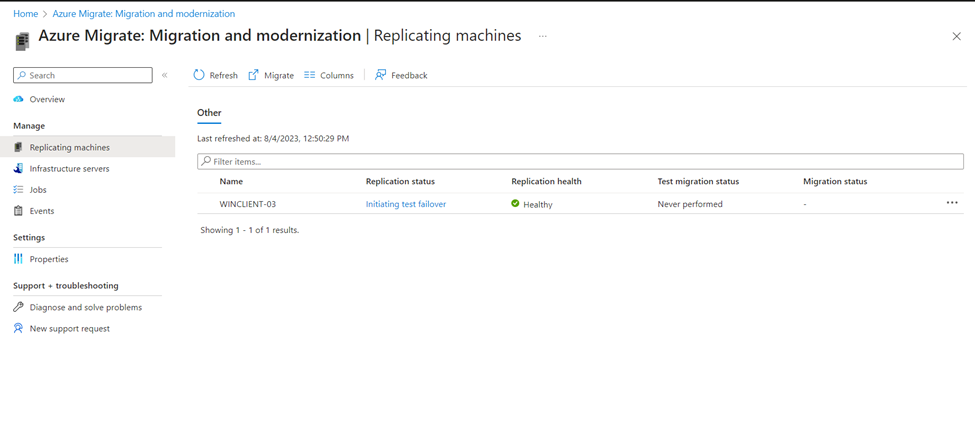
Going back to the Migration and modernization tool, the VM’s Replication status will be changed to the Initiating test failover.
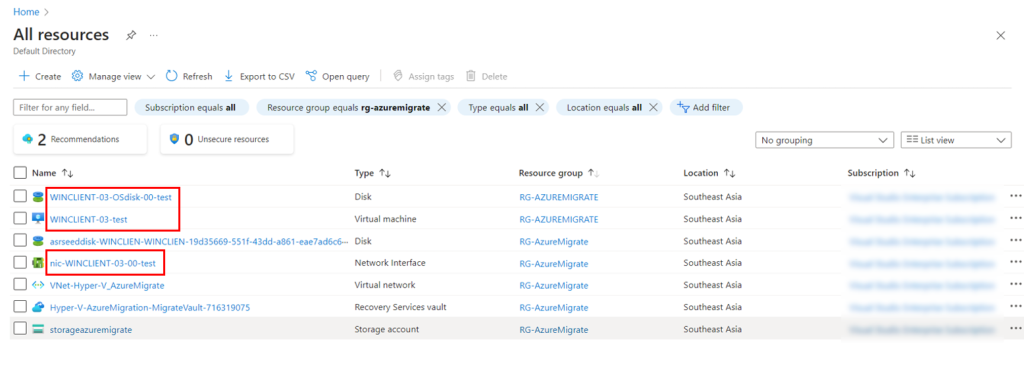
4. Once the migration finishes, it will create all the required resources for this VM with the suffix “-test” in your targeted Resource group.
Now, you have the opportunity to utilize this migrated test VM to thoroughly verify the status of the machine, assess its operations, evaluate its data integrity, and even test the functionality of any hosted applications. This testing can be conducted seamlessly while the on-premises VM remains active and operational.
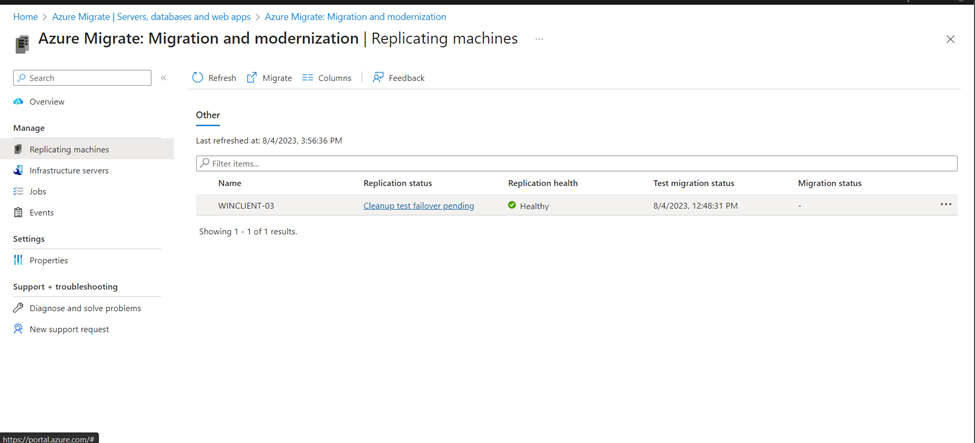
5. As you wrap up your testing phase, it’s crucial to ensure proper cleanup of the Test migration and its associated resources.
To achieve this, navigate to the Replication status and click on Cleanup test failover pending. This step will help maintain a streamlined environment after testing.
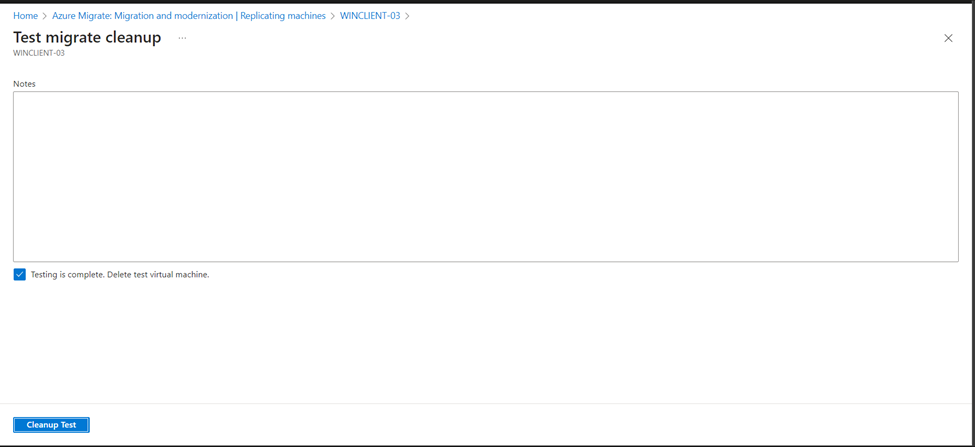
On the “Test Migrate Cleanup” page, confirm the checkmark for “Testing is complete. Delete the test virtual machine.” and then click on Cleanup Test.
Step 6: VMs Live Migration to Azure
Once you’ve confirmed the successful testing of the migration, you can proceed to migrate the on-premises machines.
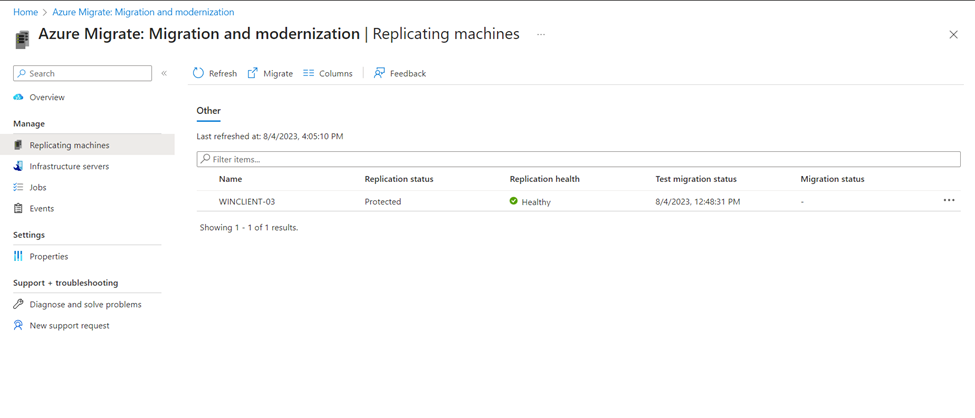
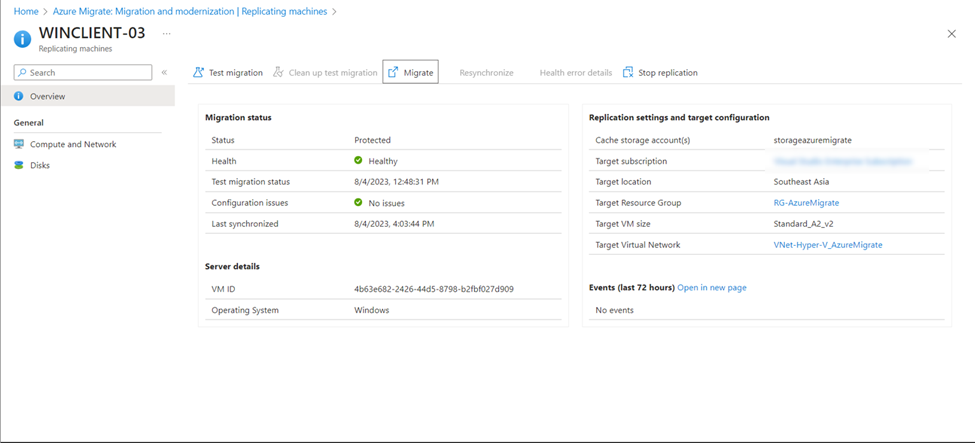
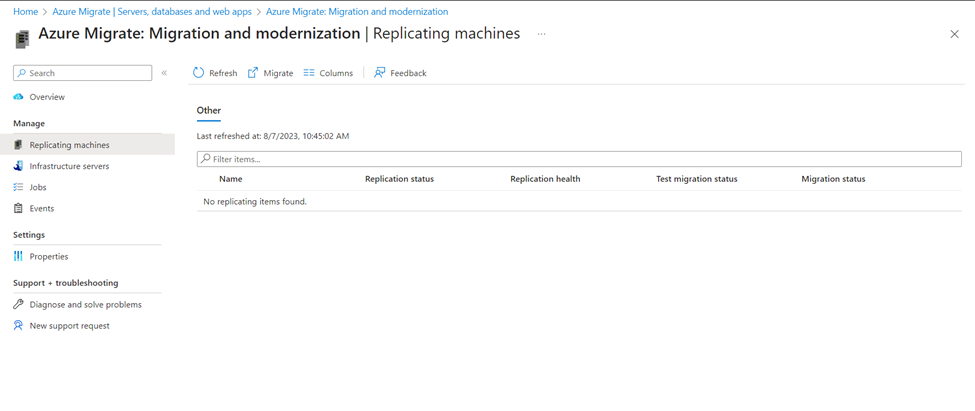
1. Within the “Replicating Machines” section, you’ll find comprehensive information about the machines being replicated, including migration status, details about the VMs undergoing migration, replication settings, and target configuration.
When you’re ready to initiate the live migration, simply click on the “Migrate” button to proceed.
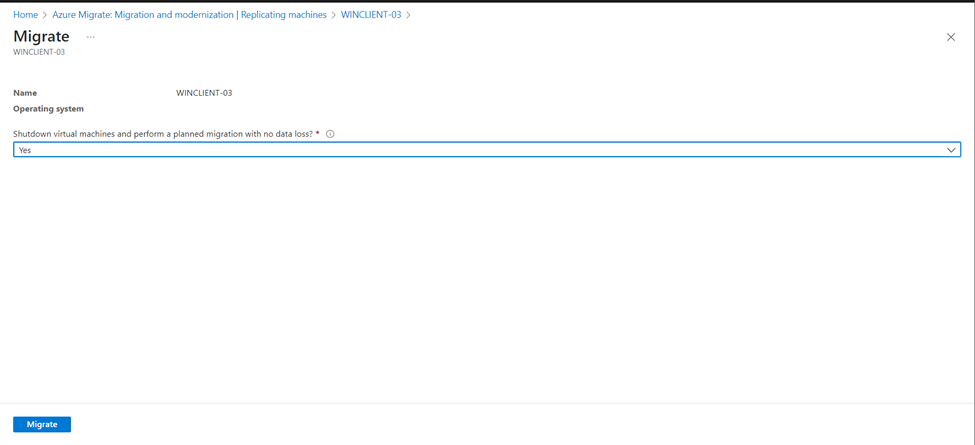
2. On the “Migrate” page, choose “Yes” under the option for a planned migration with no data loss, and then click “Migrate” to initiate the process.
3. During this phase, the VM briefly halts on the Hyper-V Server for an on-demand replication, syncing recent changes to ensure data remains intact.
If you prefer not to pause the on-premises VM, that’s okay too—just choose “No” in the previous step, and the process continues smoothly. Your migration, your call. However, please note that in exceptionally busy server scenarios, certain recent changes might not migrate as expected.
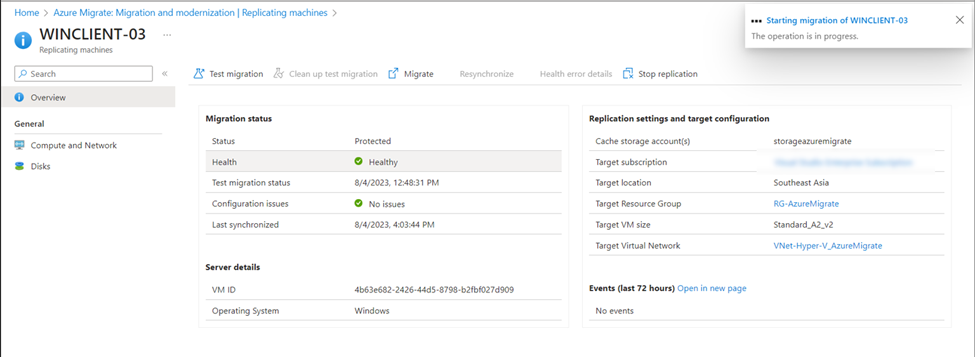
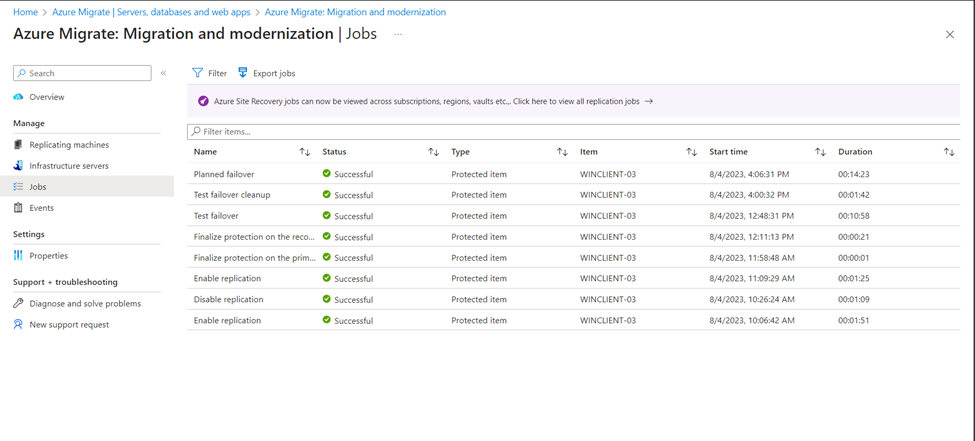
Stay updated on the migration’s progress by checking the Azure notifications and navigating to the Jobs section within Azure Migrate: Migration and modernization tool.
4. Once the migration job wraps up, you’ll find yourself equipped to oversee and control the VM through the Azure Virtual Machines page.

Step 7: Complete the Migration
Upon the migration’s successful completion, it’s now time to bring the migration jobs – namely, the replication tasks for the VM – to a halt.
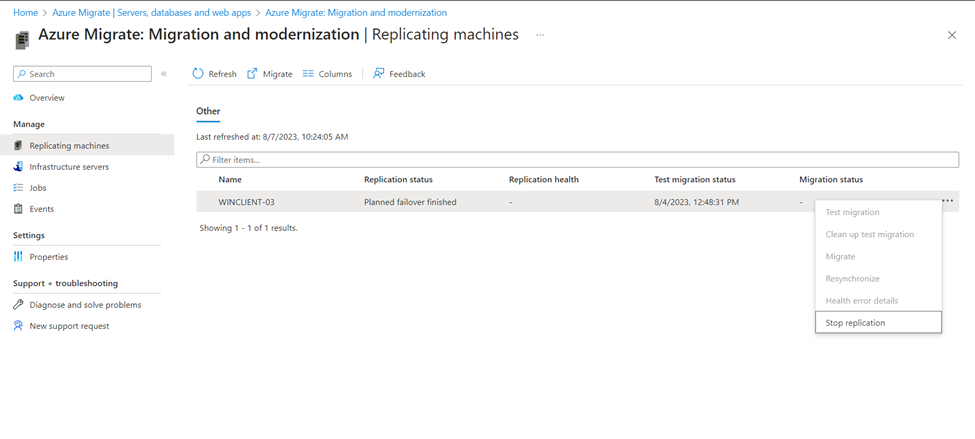
1. Go to the Replicating machines section on Migration and modernization tool. Right click on three dots on the right side of the replicated machine and select Stop replication.
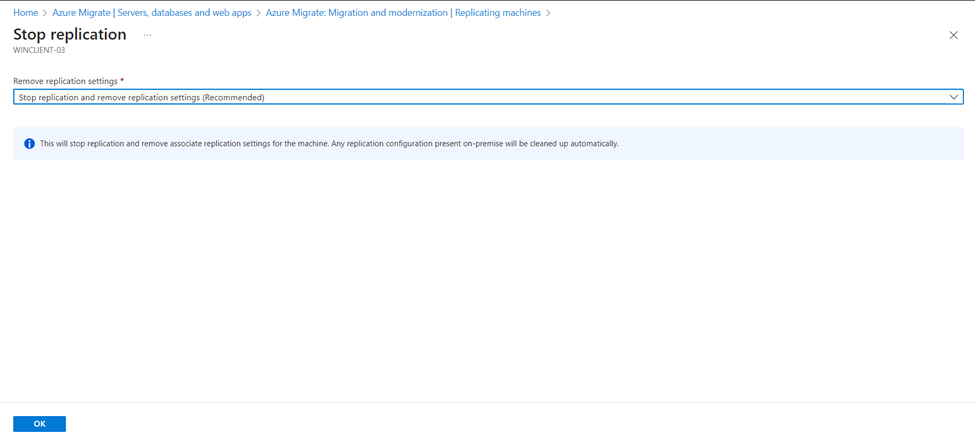
2. On the Stop replication page, you will see the Remove replication settings to be Stop replication and remove replication settings (Recommended).
This action will stop replication for the on-premises machine, disable first and then eliminate the machine from the Replicating servers count in the Migration and Modernization tool, and clean up all replication state information related to the VM in Azure.
Click on OK to finish the job.
Now, it’s time to detach the on-premises VM from your Hyper-V Server and apply appropriate post-migration best practices to ensure the smooth operation of the migrated VM within Azure.
From start to finish, you’ve learned the ropes of migrating Hyper-V VMs to Azure. Now, as you step into the azure expanse, remember that your tech journey is just taking off. Happy cloud computing!
Er. Janak Khadka

Just wish to say your article is as surprising.
The clearness in your post is simply spectacular and i could assume you’re an expert on this subject.
Fine with your permission let me to grab your feed to keep updated with forthcoming post.
Thanks a million and please continue the gratifying work.
Thank you so much for your kind words! I’m really glad to hear that you found the article clear and helpful. Your support means a lot to me! Feel free to subscribe to the feed to stay updated on future posts—I’d be happy to have you follow along. If you have any questions or need further information, don’t hesitate to reach out. Thanks again, and I’ll definitely continue sharing more content!
There is definately a great deal to know about this issue.
I like all of the points you have made.
Thank you for your comment! I’m delighted to hear that you found the points helpful. It’s always rewarding to see that the information is useful. If there’s anything more I can help with, I’ll definitely do my best to assist. Feel free to reach out anytime!
I blog quite often and I seriously appreciate
your information. Your article has really peaked my
interest. I will book mark your blog and keep checking for new information about once
a week. I opted in for your RSS feed as well.
Thank you so much for your kind words! 😊 I’m glad to hear that you found my article interesting and helpful. It’s great to know that you’ve bookmarked my blog and subscribed to the RSS feed—I truly appreciate your support! I’ll do my best to keep sharing informative and engaging content regularly. Feel free to drop by anytime, and don’t hesitate to share your thoughts or suggestions. Happy reading! 🚀
Good web site you have here.. It’s difficult to find high quality writing like yours nowadays.
I truly appreciate people like you! Take care!!
Thank you so much for your kind words and encouragement! It truly means a lot. Take care and stay connected! 😊
Hi to every one, the contents existing at this site are genuinely
amazing for people knowledge, well, keep up the good work fellows.
Thank you so much for your kind words! I’m glad you found the content helpful. Stay tuned for more updates, and feel free to share your thoughts anytime! 😊
Greetings from Florida! I’m bored at work so I decided to browse your
website on my iphone during lunch break. I really like
the information you provide here and can’t wait to take a look when I get home.
I’m amazed at how quick your blog loaded on my cell phone ..
I’m not even using WIFI, just 3G .. Anyways, good site!
Hi there! I just wanted to ask if you ever have any trouble with hackers?
My last blog (wordpress) was hacked and I ended up losing a few
months of hard work due to no data backup. Do you have any methods to stop hackers?