This article explains how to use the Mail Merge feature in Power Automate to create and email messages by using data from Excel Online Worksheet stored.
Step 1: Set up the Data Source (Excel Data File in Excel Online)
Prepare your Excel worksheet and make sure that is well structured for the purpose you’re using it.
I’m using the below Excel file as my data source (you should prepare this file as per your requirement which you’re going to use later in the Power Automate).
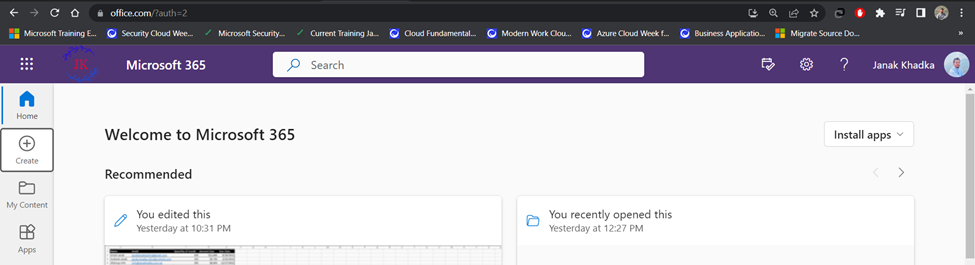
- First of all, log in to your Microsoft 365 account via URL: www.office.com. Click on the Create option from the left pane.
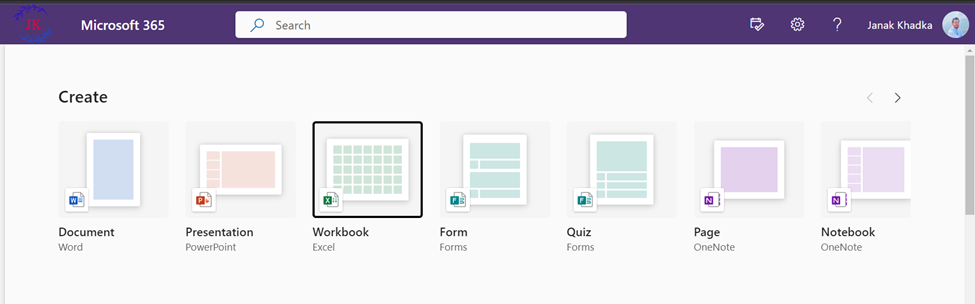
- Select Workbook to create the Excel Data file.
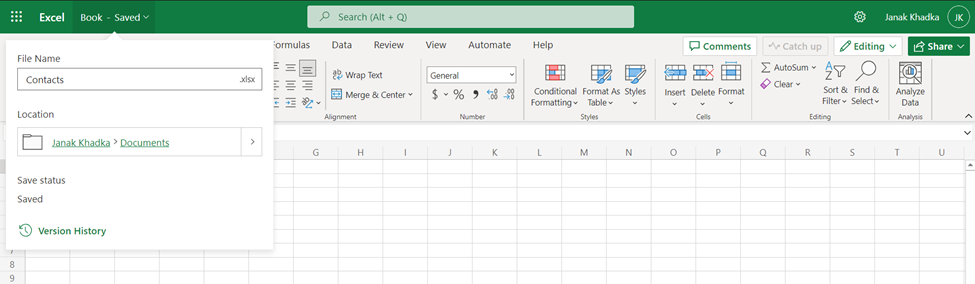
- Give a name to your file which will be automatically saved to your OneDrive for Business (OFB) or you can first create your file in OFB in your desired folder/subfolder and opened it from that location.
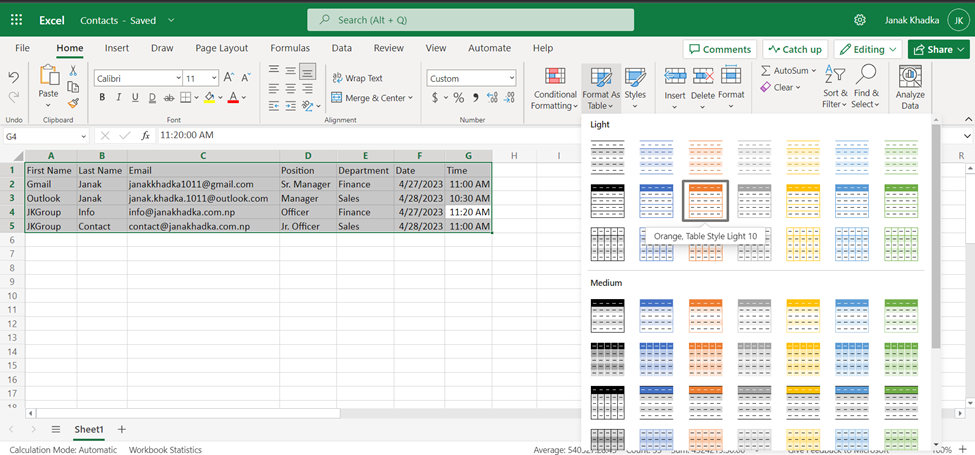
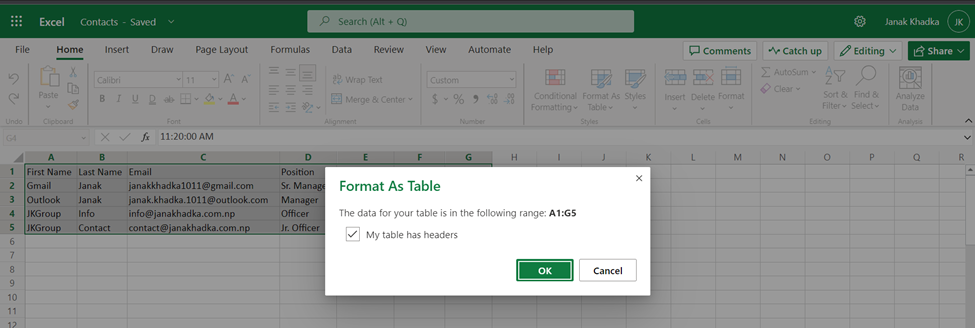
- Prepare your data and format it as Table from the section Home à Format As Table option
Step 2: Set up the Main Flow from Power Automate
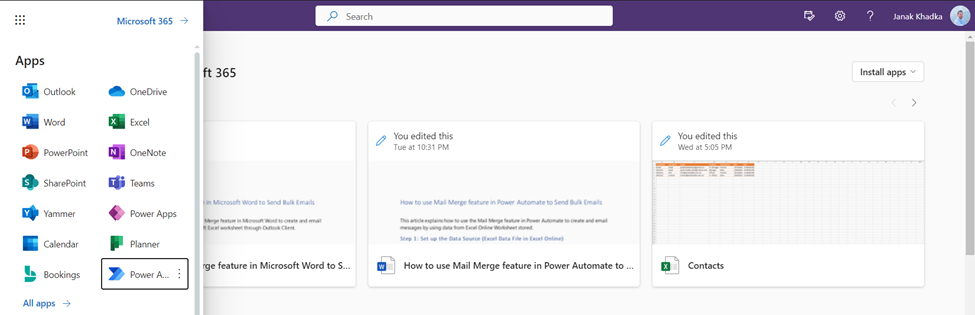
- Open Microsoft Power Automate application from the list of apps in Microsoft 365 from left pane.
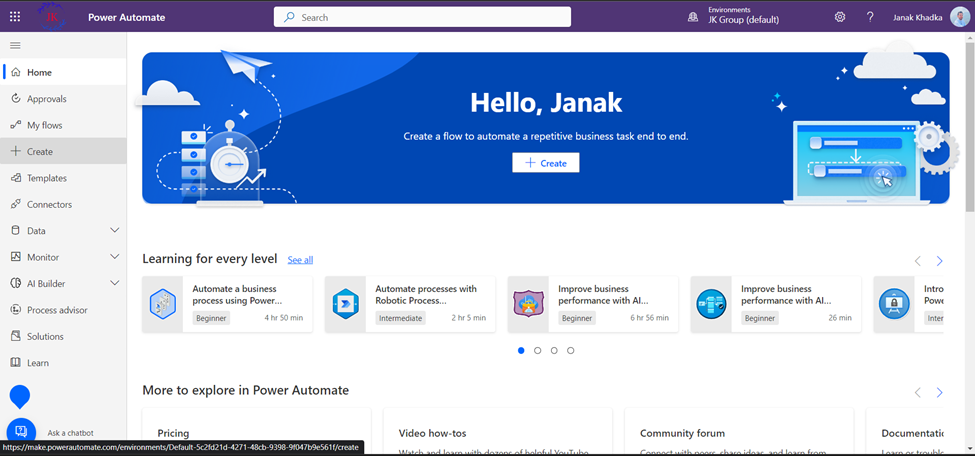
- Click on Create from the left pane of the newly opened page “Power Automate”.
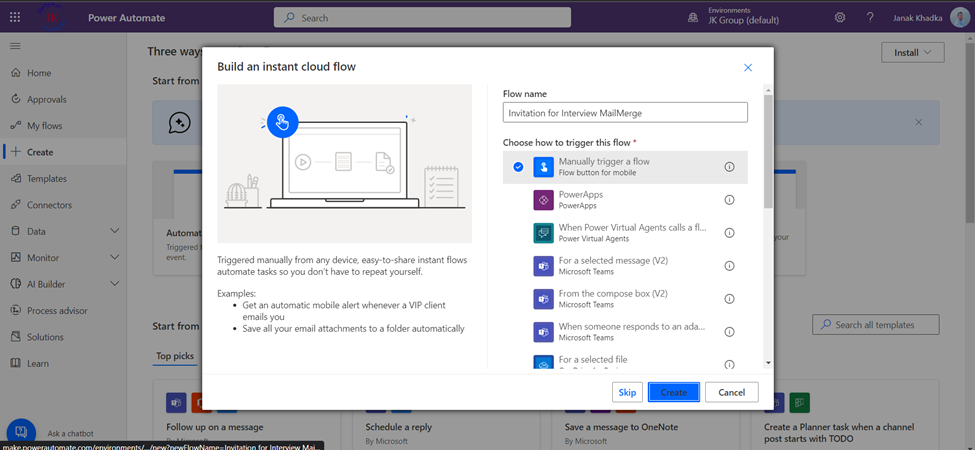
- Choose Instant Cloud flow from the suggested item lists.
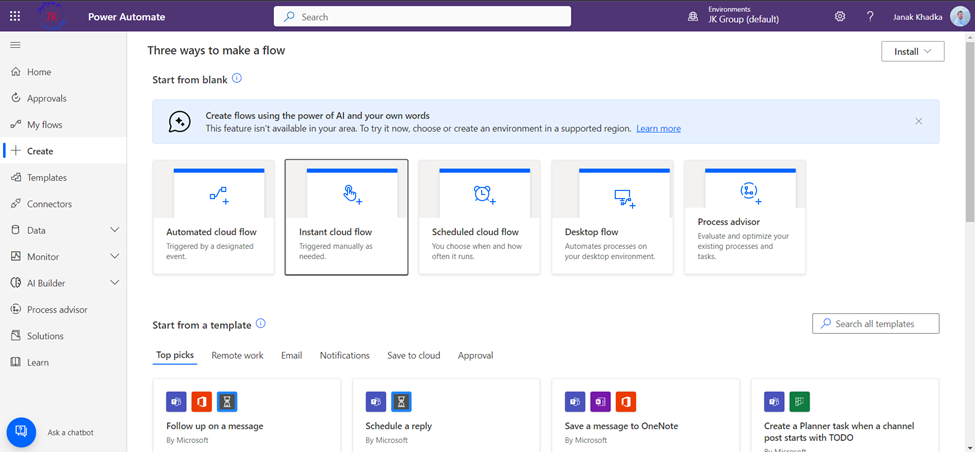
- Give a name to your Flow and select Manually trigger a flow option and then click on Create.
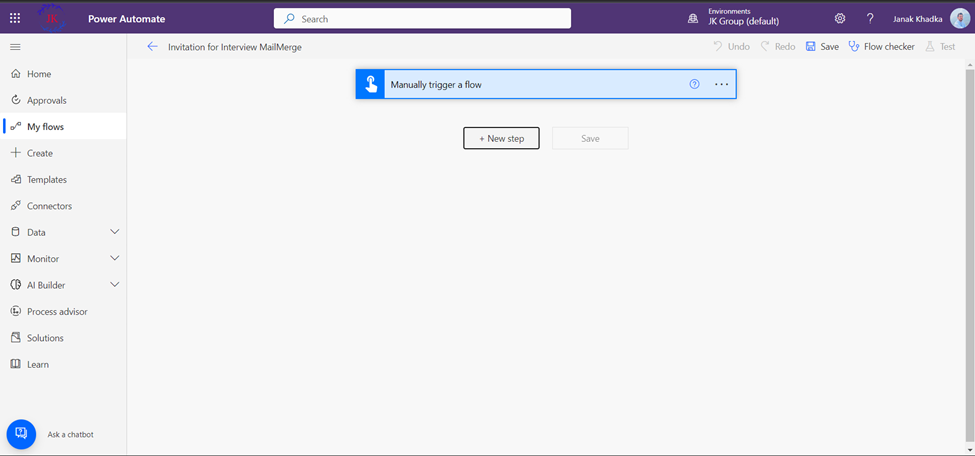
- It will create a flow for you. Now, click on New step for configuration of your flow.
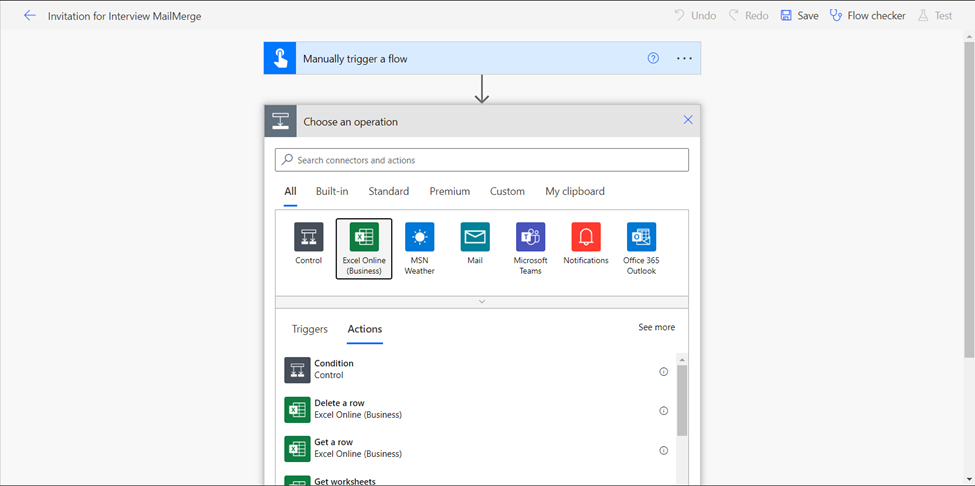
- In the Choose an operation section, search for Excel Online (Business) and select it or you can directly choose it from the listed options if it is available there.
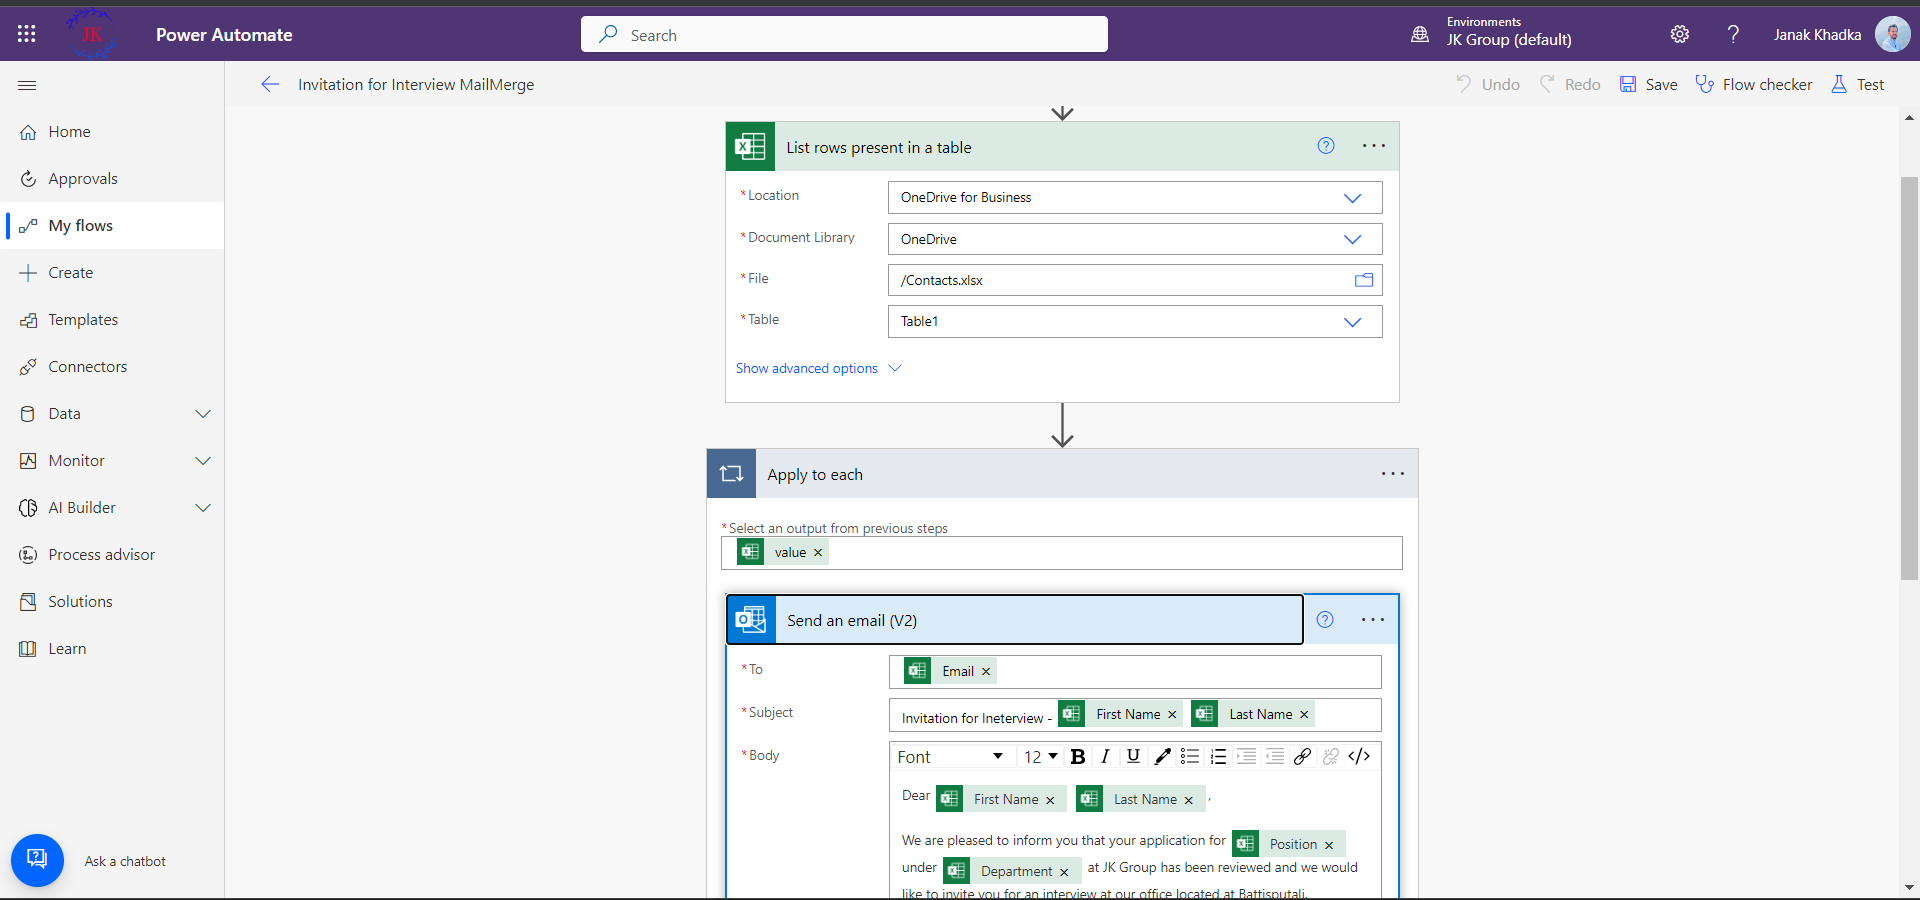
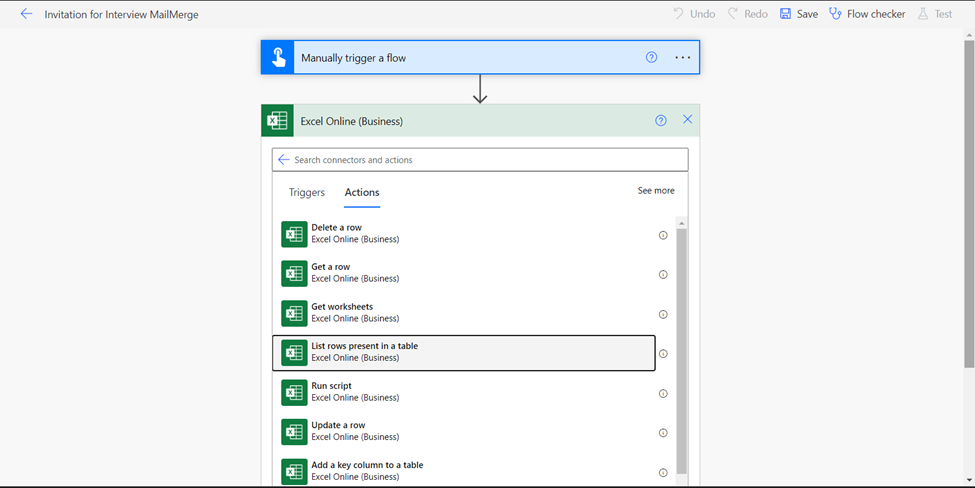
- Now in the next, search and select the List rows present in a table option.
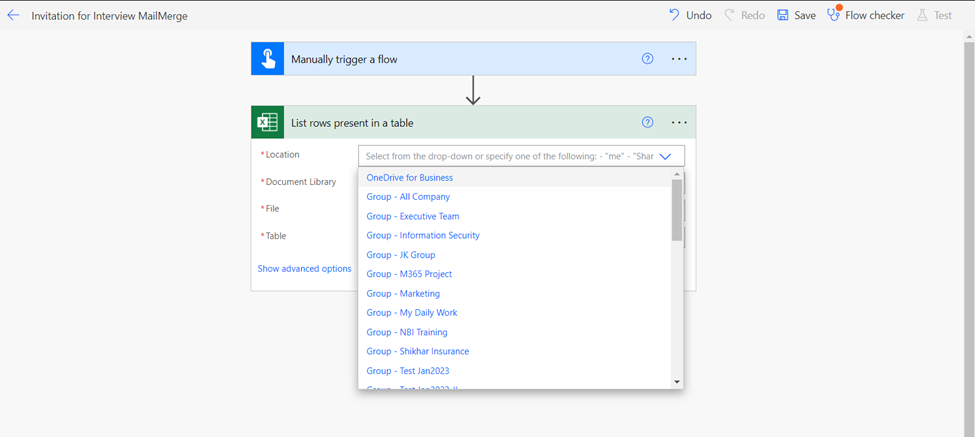
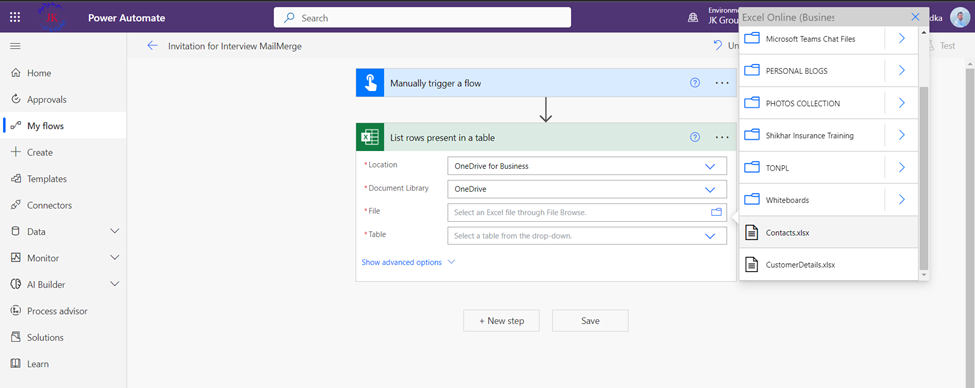
- On the next section, choose Location, Document Library, File and Table of your Data Source Excel File.
In my case:
Location: OneDrive for Business which will automatically populate the Document Library section to OneDrive
File: Contacts.xlsx <Excel File>
Table: Table1

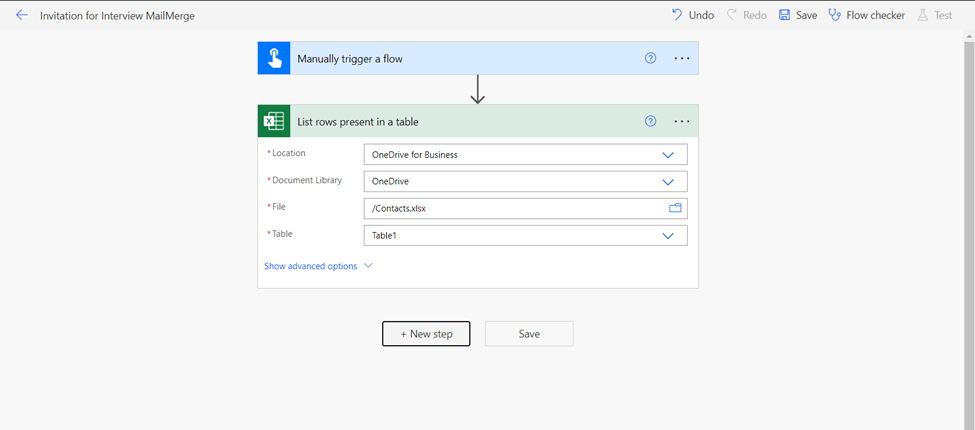
Then, click on “New step”.
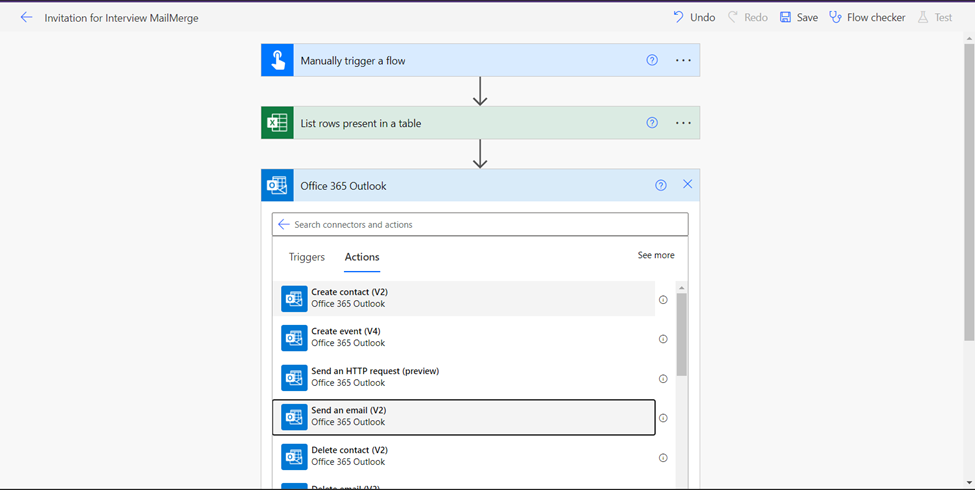
- Now on the next step, search for outlook and choose Office 365 Outlook option.
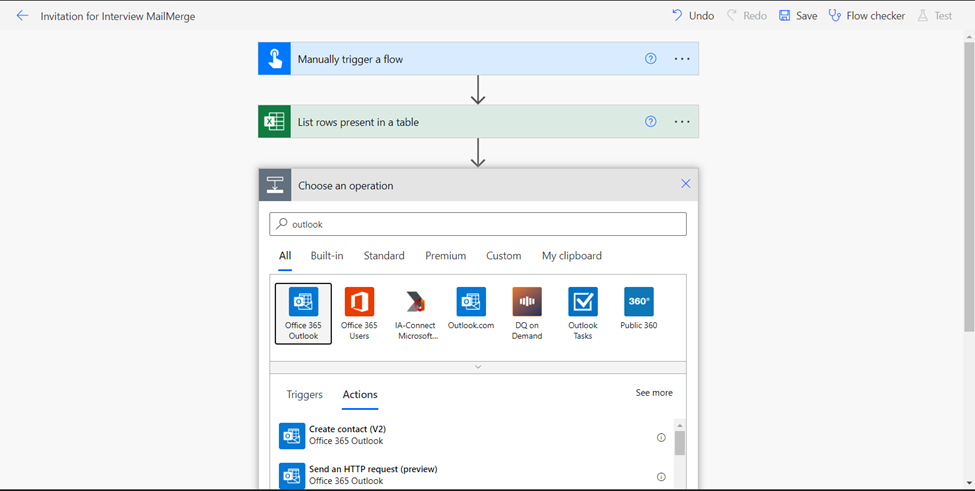
- In the Actions tab, choose the Send an email (V2) option.
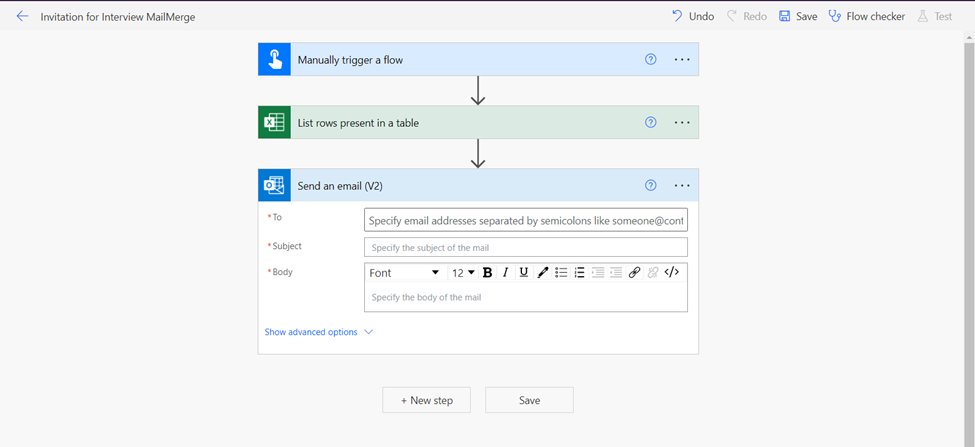
- Inside the Send an email (V2) section, draft your sending email according to your requirements. Since we are using mail merge, the email draft will fetch few details from the Data Source Excel file.
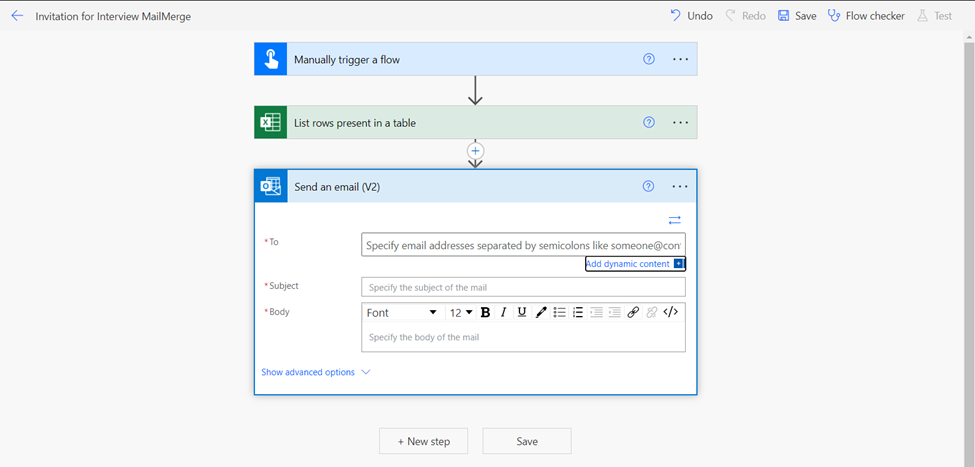
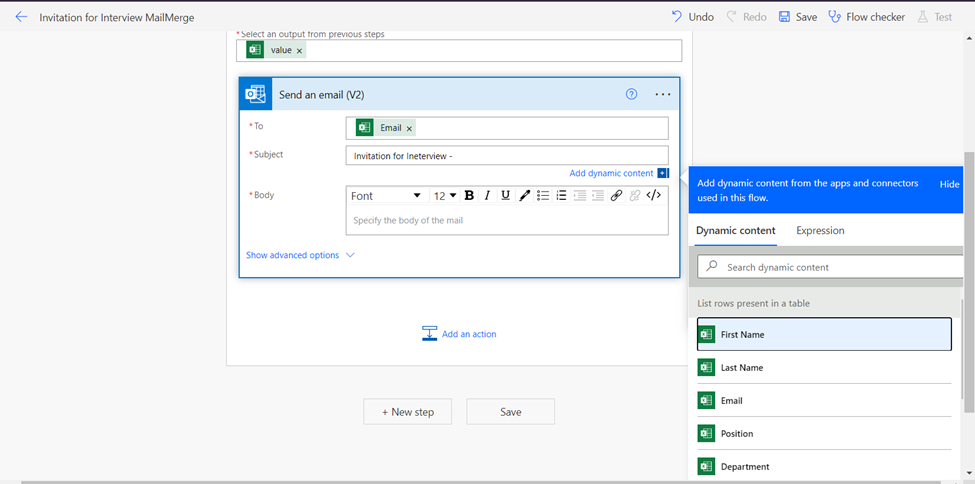
Click on To section, and then choose Add dynamic content option. It will open Dynamic content section on the right side, choose Email from the list.
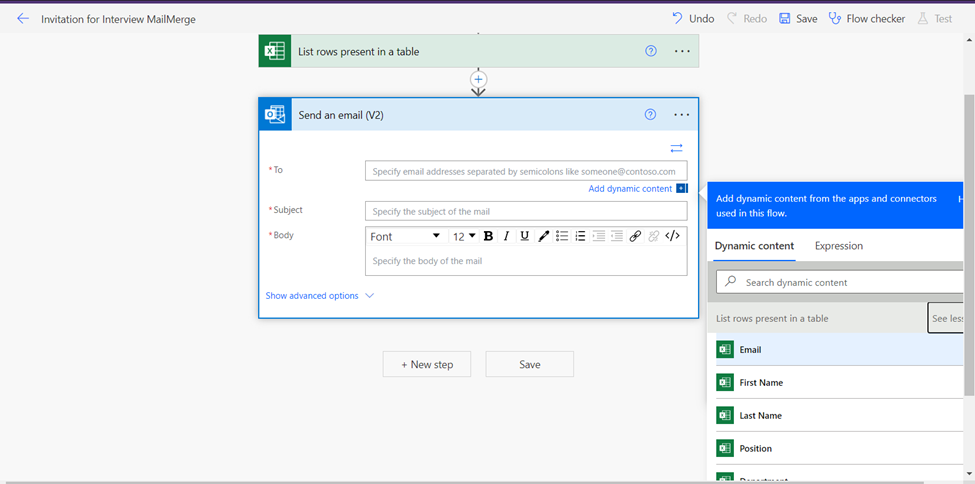
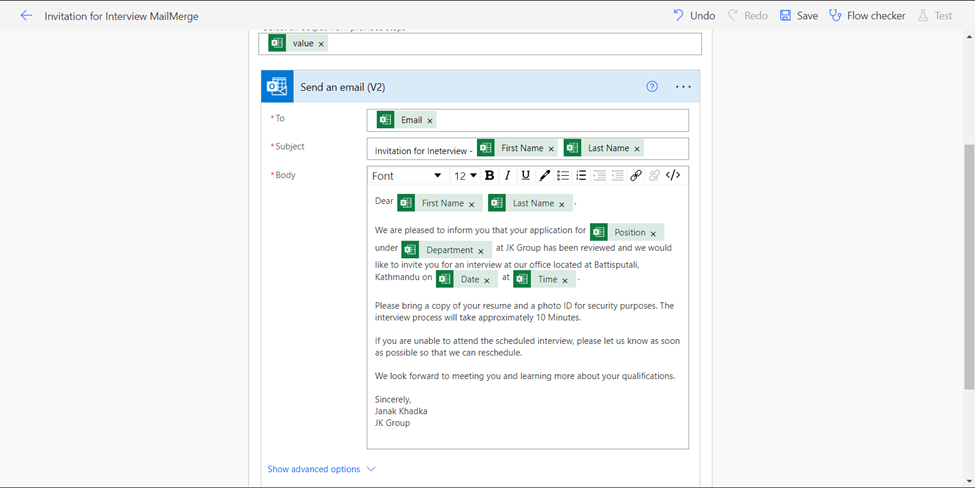
Now, you can see Email as dynamic content on the To section. Now, write your Subject, you an also make it dynamic fetching some information from your data source if you required. Here, I’ve created my Subject with static content “Invitation for Interview –” and choosing First Name and Last Name as dynamic content from excel table.
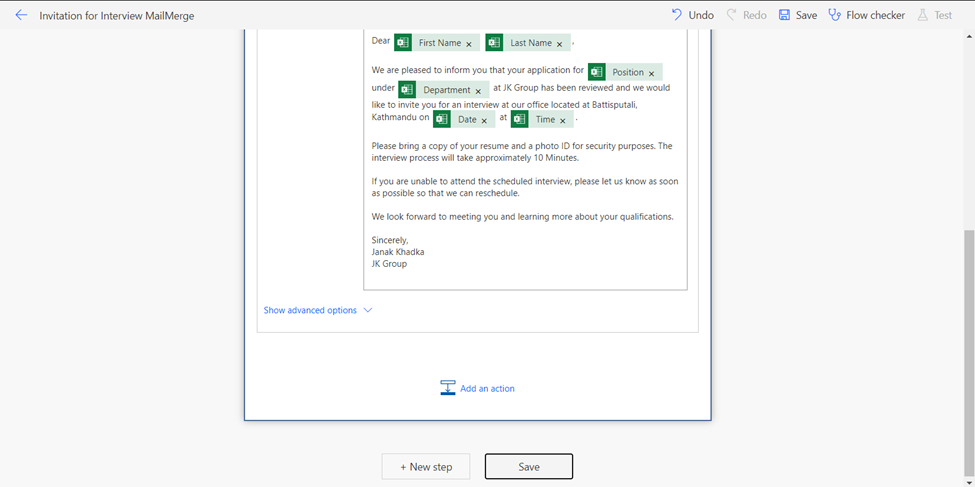
Similarly, create the Body section of your sending email and then click on Save on the bottom of the Flow page.
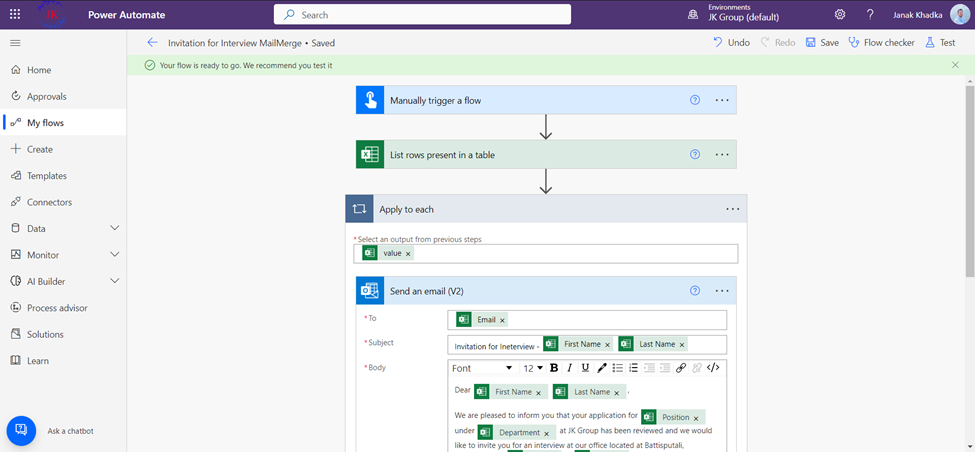
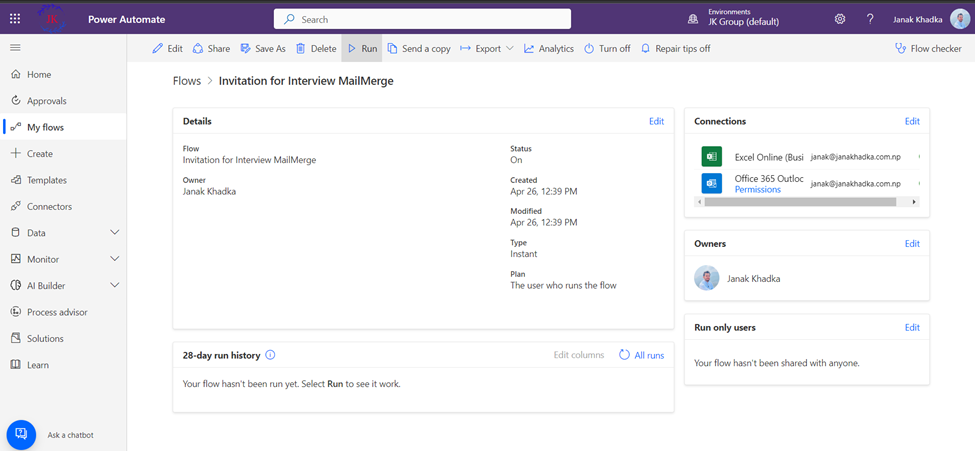
Now, your flow is ready, and you can see it listed in your My flows section.
Step 3: Run the flow to send Emails
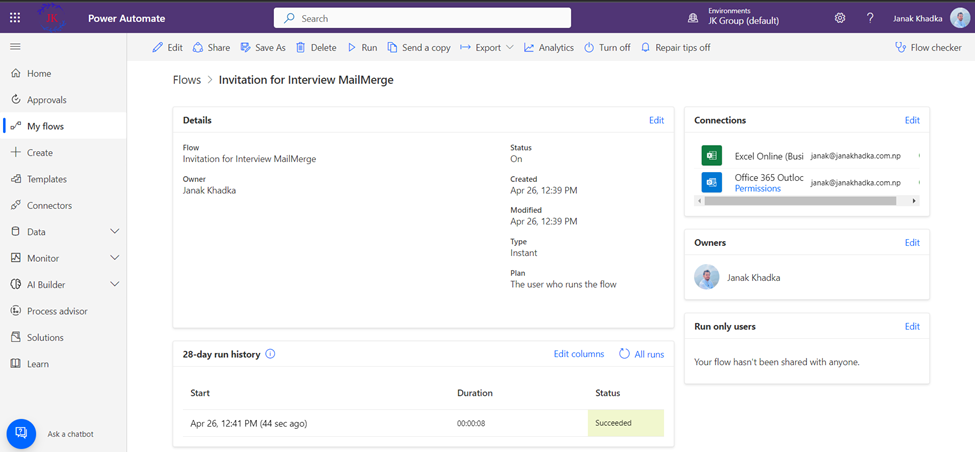
- To run the flow, select your flow and click on Run from top of the page. You can see the status of the flow and its run history here on the same page.
- After completion of the Run trigger, it will show the details of the flow and its success/failure status as shown below. In case of failure, it will also show the details of failure.
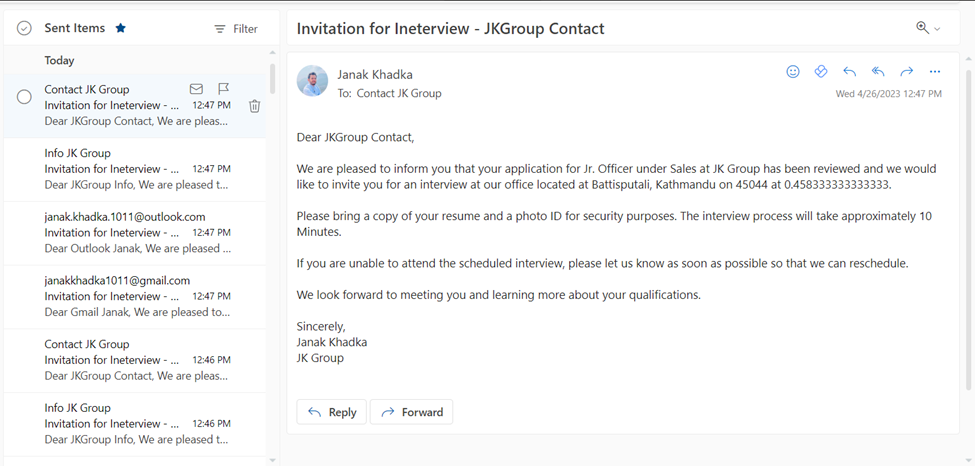
Below is the email received to one of the user from the Excel file.
Er. Janak Khadka