Have you ever wanted to share a file with others in OneDrive for Business or SharePoint Online, but found yourself limited by the default view and edit options?
Fear not! In this blog, we will walk you through the process of granting custom permissions, enabling you to control access with precision. Get ready to unlock the true potential of sharing in these powerful Microsoft platforms.
Step 1: Adding Custom Permission Levels
First of all, you need to add your custom permission levels in your own OneDrive Settings. This will allow each individual to manage their access based on their unique requirements, ensuring a personalized and secure experience tailored to their needs.
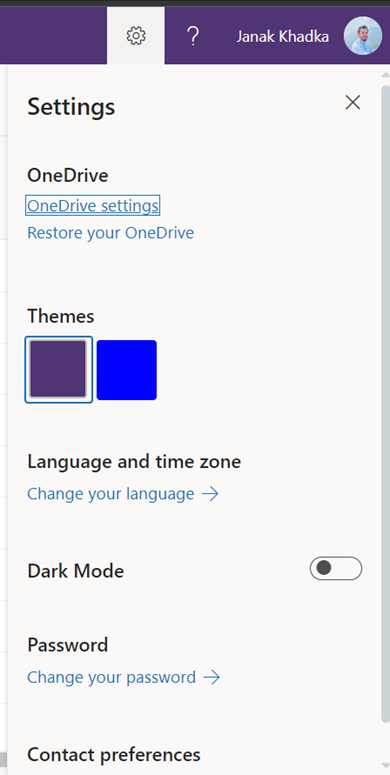
1. Access your OneDrive for Business page, click the Gear button in the upper-right corner, and select “OneDrive settings”.
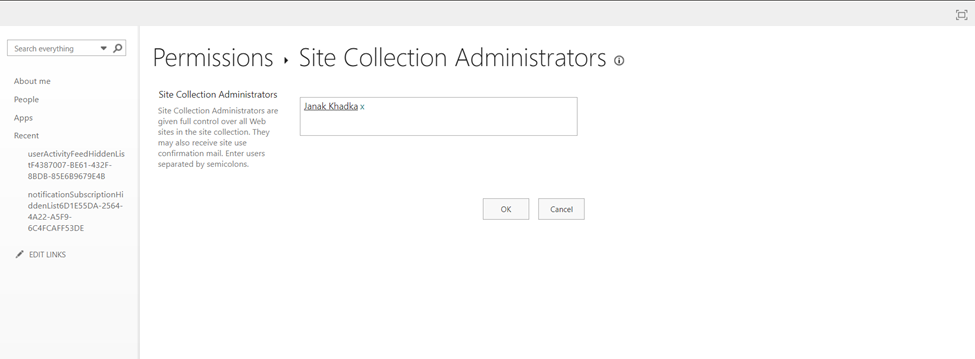
2. On the next page, choose “More settings” from the left pane, then click “Site collection administrators” under “Manage access”.

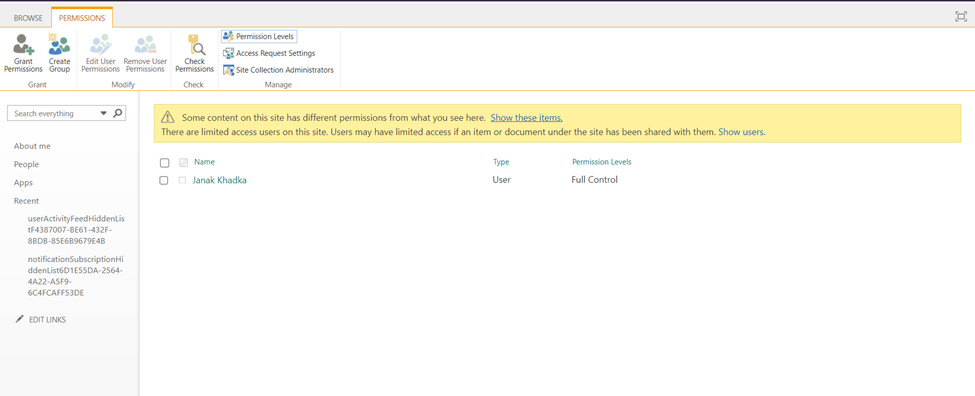
3. On the next page, you’ll find the site’s admin users, which, for OneDrive, should be the user itself. Click on “Permissions.”
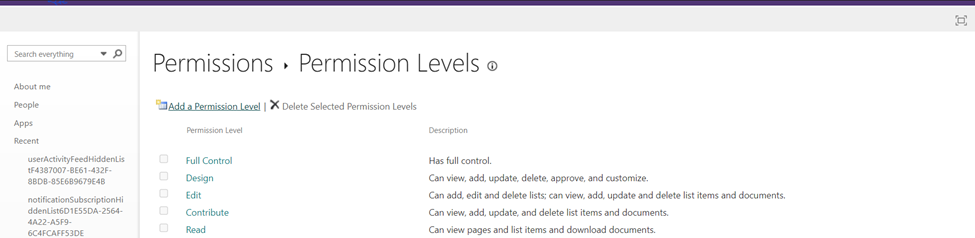
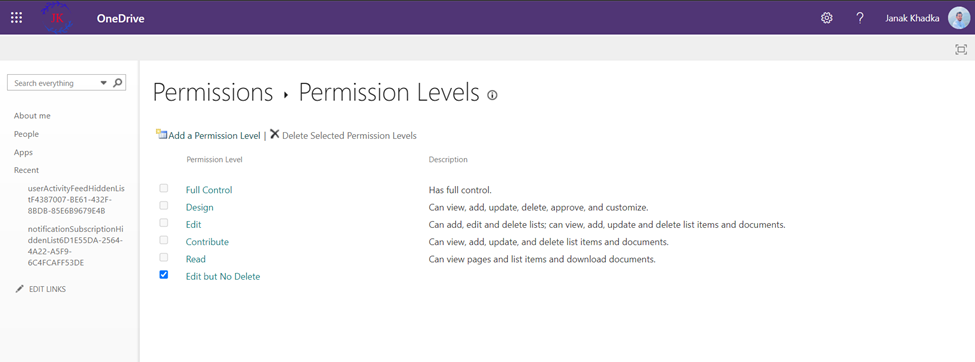
4. From PERMISSIONS tab, click Permission levels.
5. Proceed to the next page where you’ll find default permission levels. Click “Add a permission level” to include your desired ones.
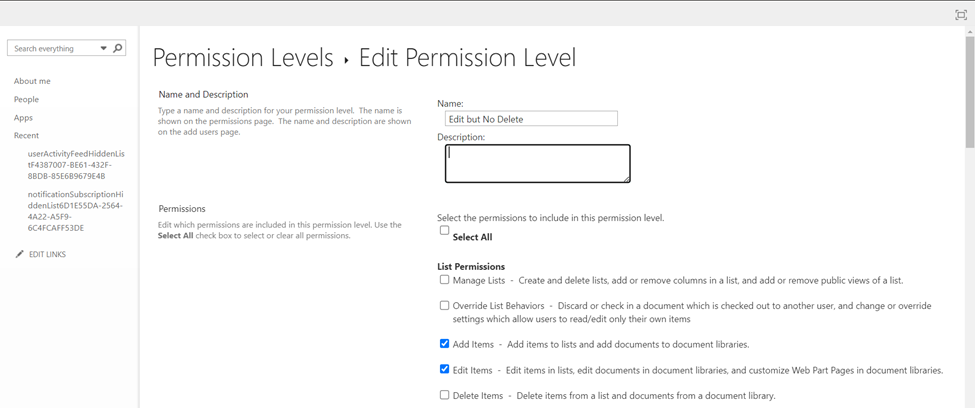
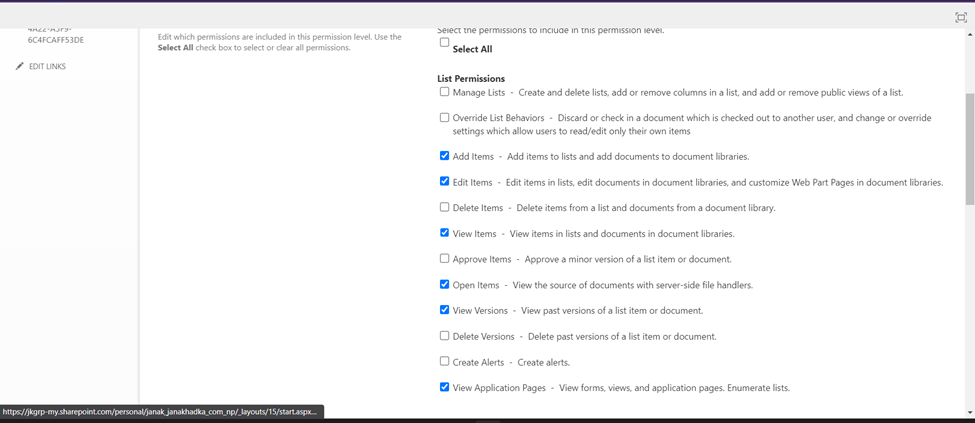
6. Define the new permission level with a name and description. Next, select the desired options for custom access.
In this case, opt for Add Items, Edit Items, View Items, Open Items, View Versions, and View Application page for list permissions, allowing users to add and edit files/folders without the ability to delete them. Finally, click on Create to complete the setup of the custom permission level.
7. Your settings now display the added Permission Levels.
Step 2: Sharing Options
With the introduction of newly created custom permission levels, you can now easily share your files and folders.
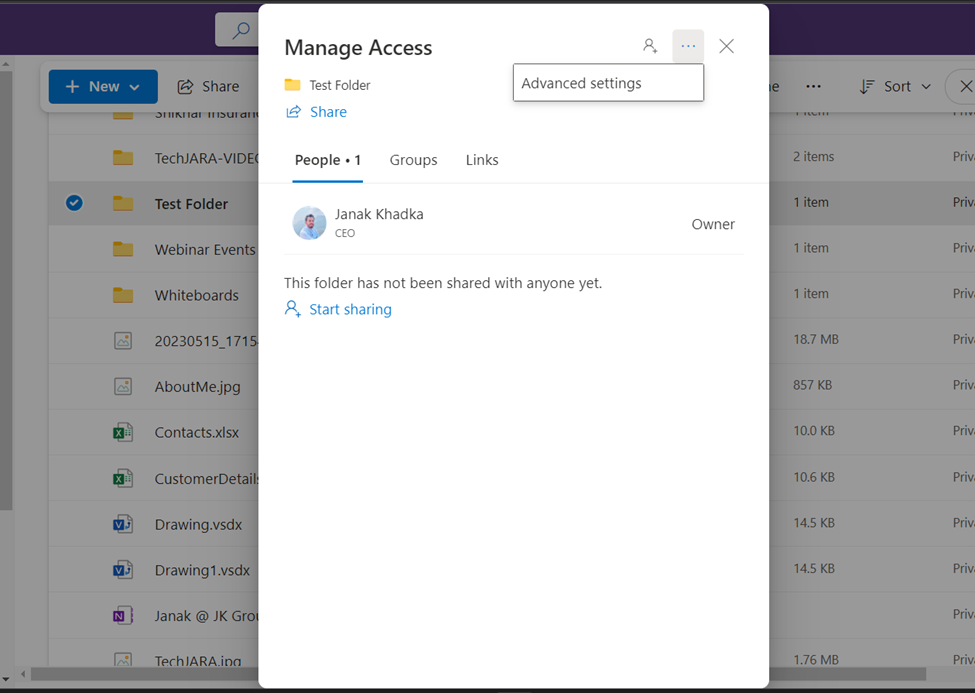
1. Go back to your OneDrive for Business, select the file or folder you want to share with others, click on “Three dots” and then click on “Manage access”.

2. On the next page, from right corner click on the “three dots” again and select “Advanced settings”.
3. Click on “Grant Permissions”.
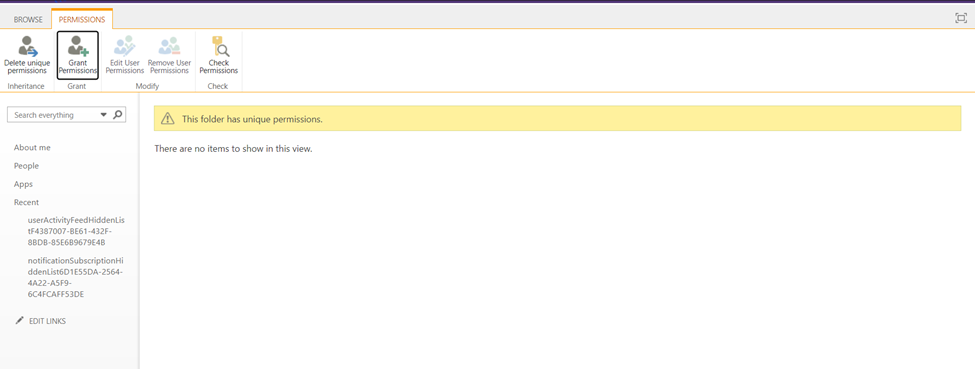
In certain instances, the options outlined above might not be immediately visible within the “Permissions” section. This scenario can occur as a result of inheritance settings, thereby limiting the display to the subsequent array of choices:
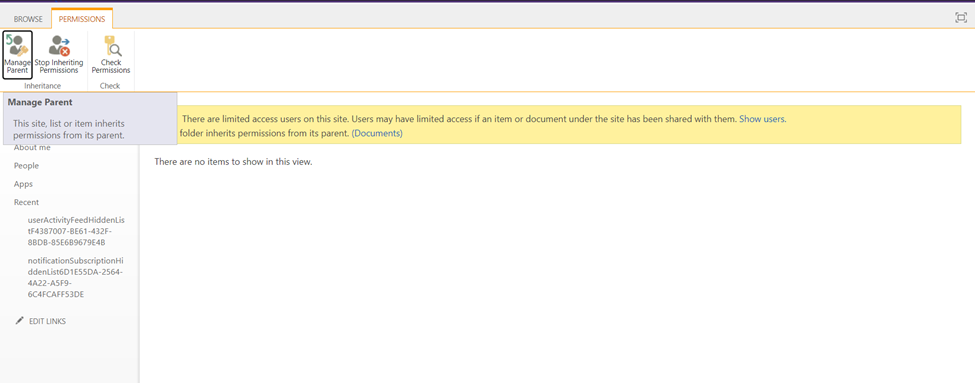
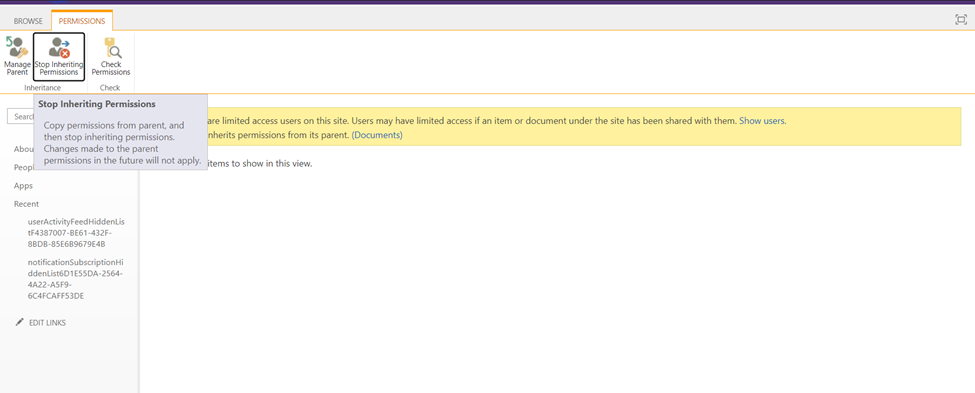
In this particular situation, should you desire to uphold the inheritance settings from its parental components in the times ahead, click on the “Manage Parent” option. Conversely, if you foresee no need for these inheriting permissions down the road, opting for “Stop Inheriting Permissions” will duplicate the current inherited permissions within it, while concurrently putting an end to any future inheritance.
Having absorbed this insight, you’ll find the options mirroring the step 3. Click on “Grant Permissions” to proceed.
4. Specify the username, click SHOW OPTIONS, and select the newly created Permissions Level from the drop-down menu to share the file/folder. In my case, it’s “Edit but No Delete.” Click “Share” to finish.
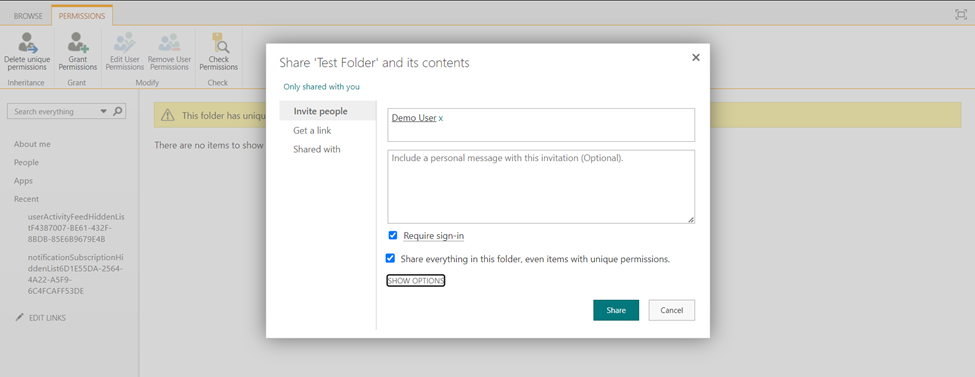
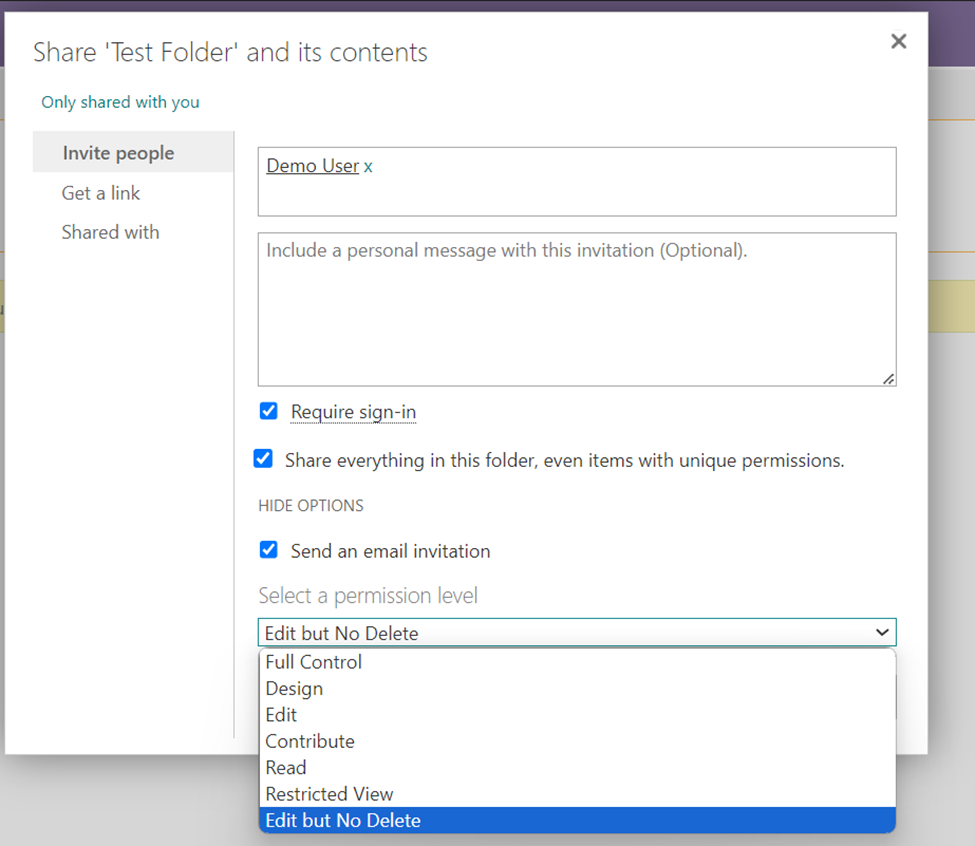
Here, I’m also adding another user with the different permission level “Contribute” to verify the differences in the setting.
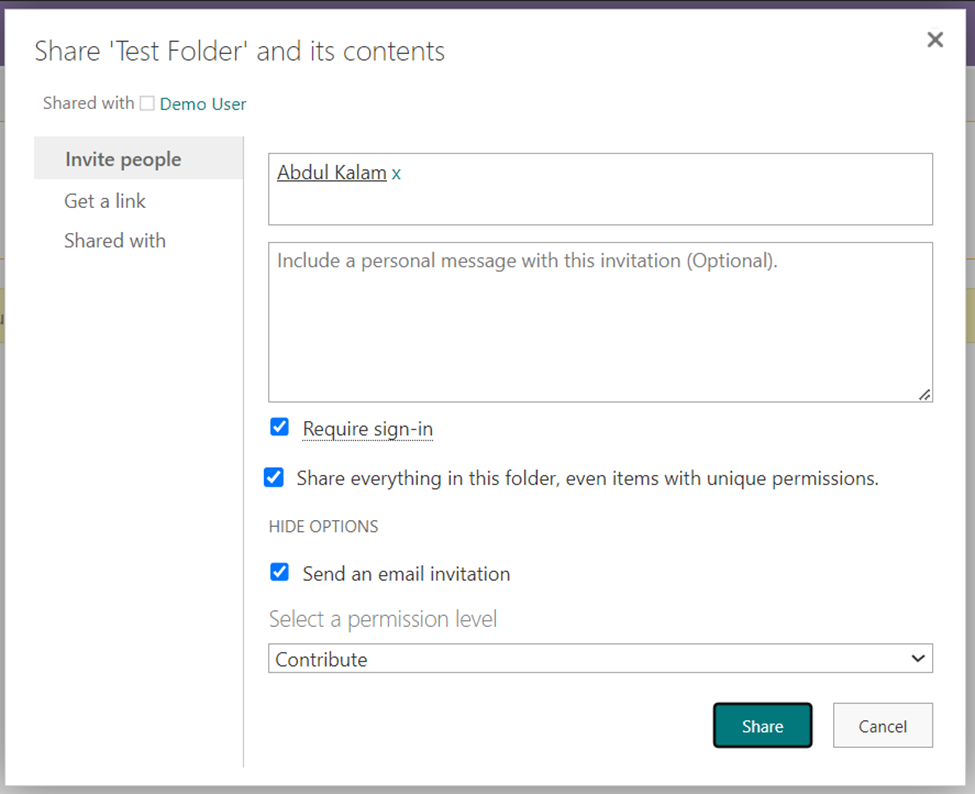
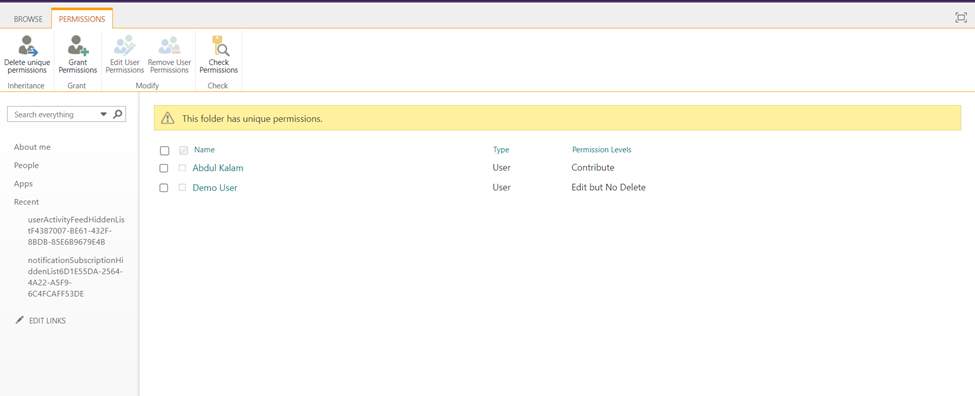
5. You can now see the two users in the list with different permission levels.
Step 3: Verify the Permissions
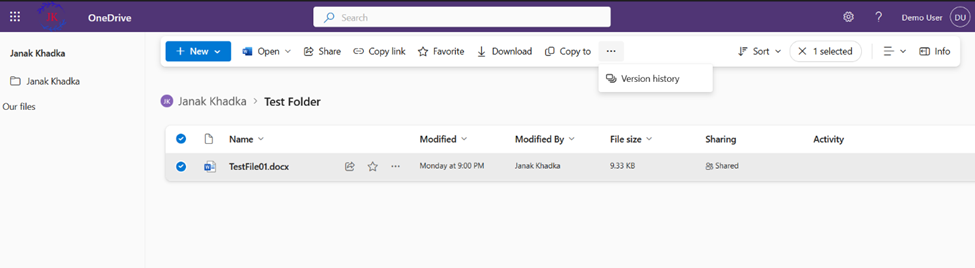
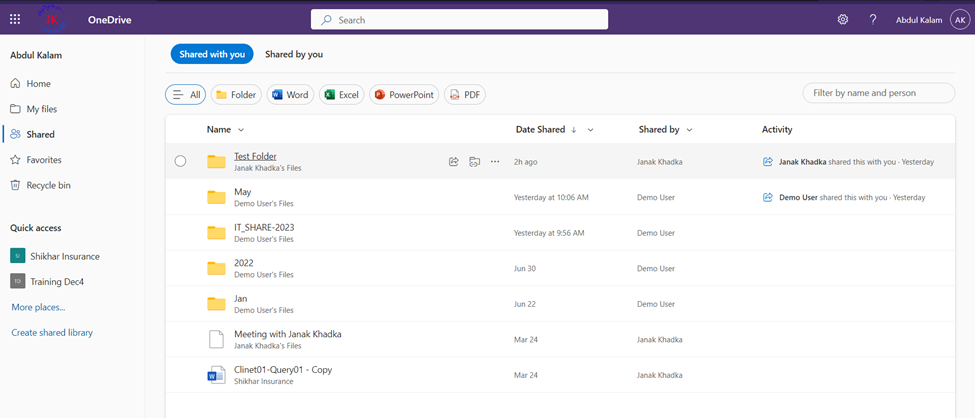
1. Visit “Demo User” OneDrive for Business profile. Click “Shared” on the left pane, find the recent shared folder under “Shared with you.”
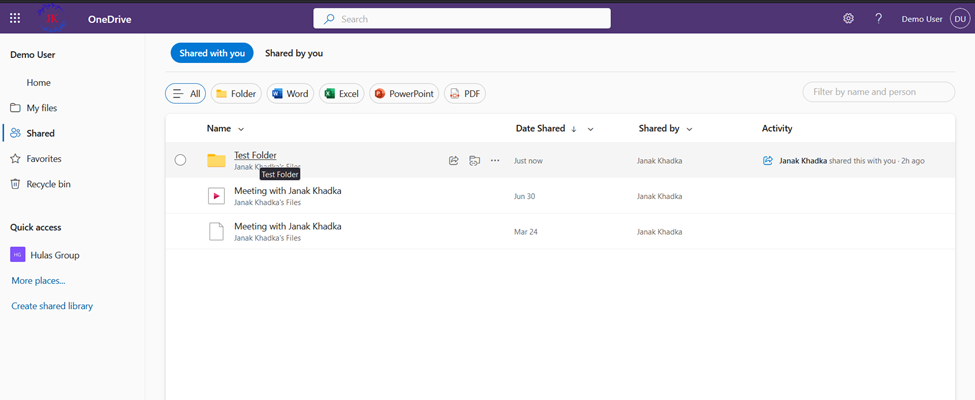
2. Open the folder and choose the desired file. Upon reviewing the permissions, you’ll find that the “Delete” and “Move to” option is not among the available choices.

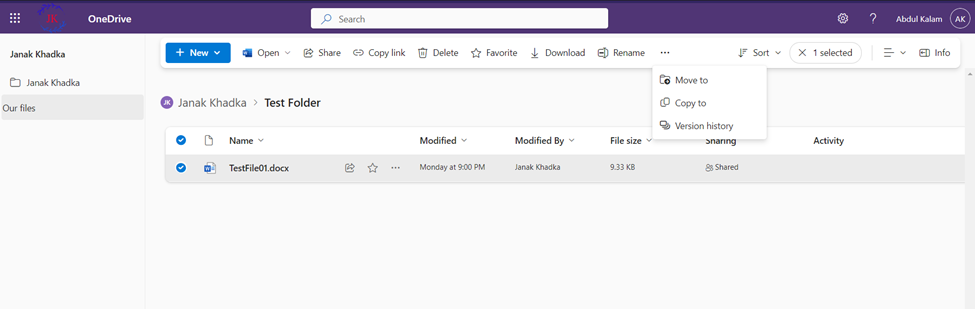
3. Again, visit “Abdul Kalam” on OneDrive for Business and access the Shared section.
4. Open the shared folder and select the desired file. Upon reviewing the permissions, you’ll find that the “Delete” and “Move to” option is among the available choices.
In the similar way, we can limit the access permission levels on the files and folders on SharePoint site as well.
Er. Janak Khadka