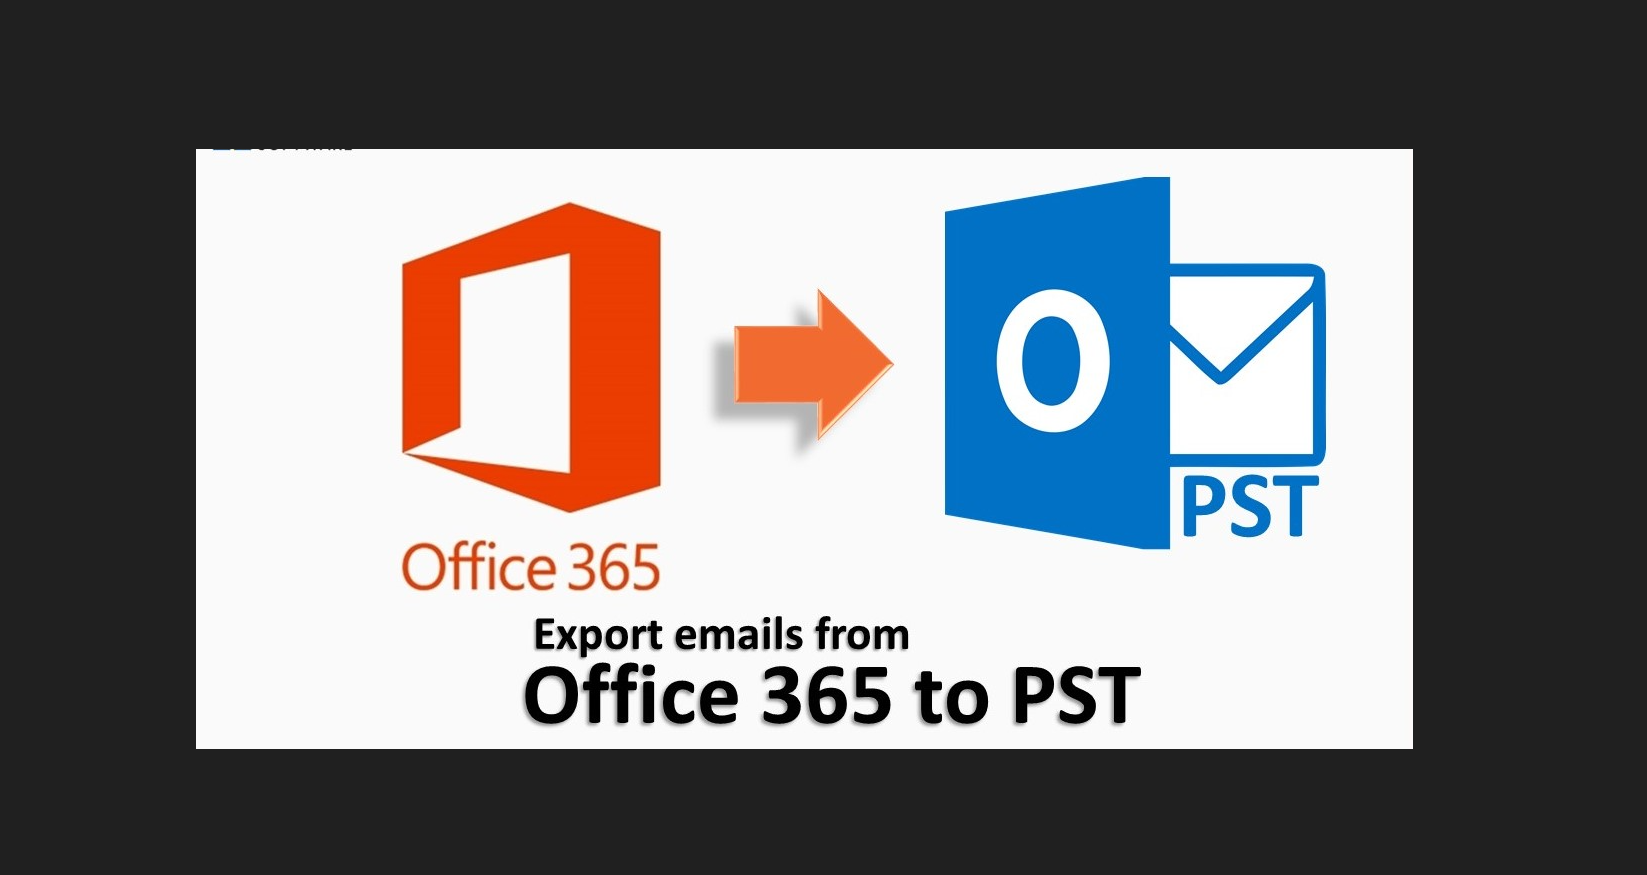
Sometimes, we might need to export Microsoft 365 mailboxes to a PST file. For example, when a user leaves the organization, when you want to migrate a mailbox to another mail service, or sometimes just for an offline backup.
Users themselves can export own mailbox through the supported Outlook client, if they are using it. If they are using mailbox through OWA (Outlook Web App), then at that time they cannot export mailbox themselves. But being as an admin, we can easily export a complete mailbox through Microsoft 365 Admin Center.
In this article, I am going to explain how you can export a Microsoft 365 mailbox to PST.
Requirements to Export Microsoft 365 Mailbox to PST
- You need to have the eDiscovery Manager role assigned to export mailboxes. A global administrator doesn’t have this role by default.
- As we are using content search and eDiscovery Export Tool, you must use Microsoft Edge browser to download PST files.
First of all, we are going to give your account a proper permission. For this, you’ll need to be a global administrator.
- Log in to the Microsoft 365 Admin Center
- In the left menu go to Compliance (Under Admin centers). It will open Microsoft Purview portal in the next window, you can also directly login to this portal through the provided link above.
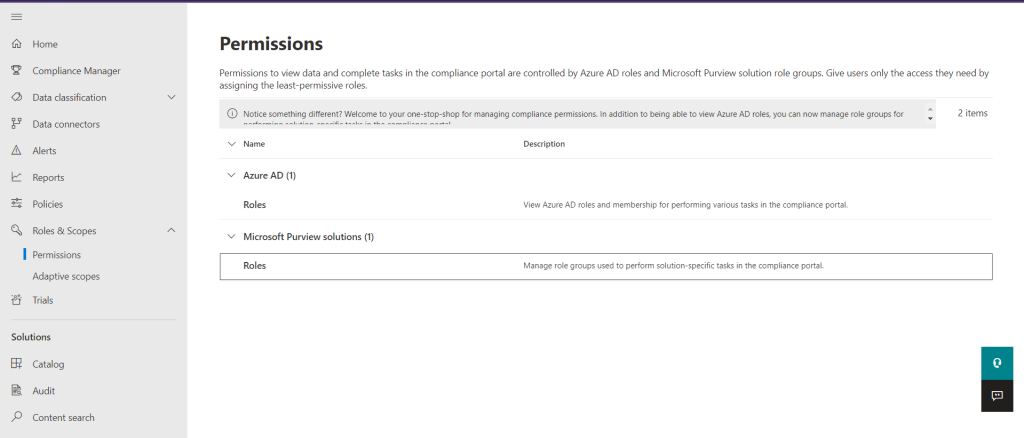
- Select Roles & Scopes and then Click on Permissions from drop down.
- Click on Roles under the Microsoft Purview Solutions
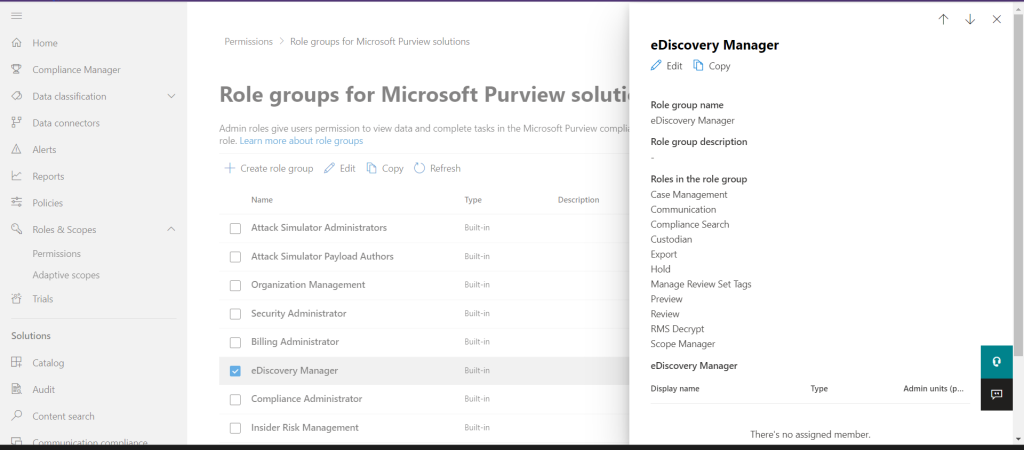
- Select eDiscovery Manager.

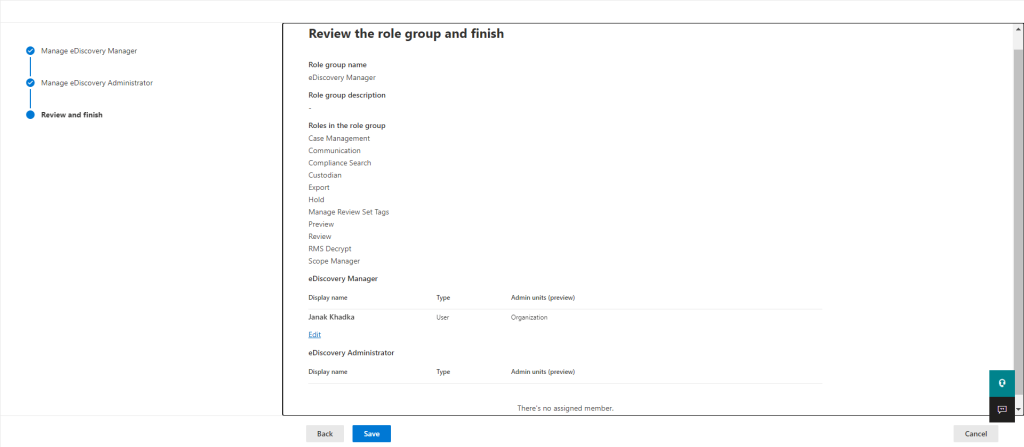
- Make sure that the Export Role is listed in the Roles in the role group (otherwise add it). Also you can verify the eDiscovery Manager role assigned users list under the eDiscovery Manager at bottom if any exist.
- Click on Edit at the top of the page.
- In the next page, click on Choose Users.
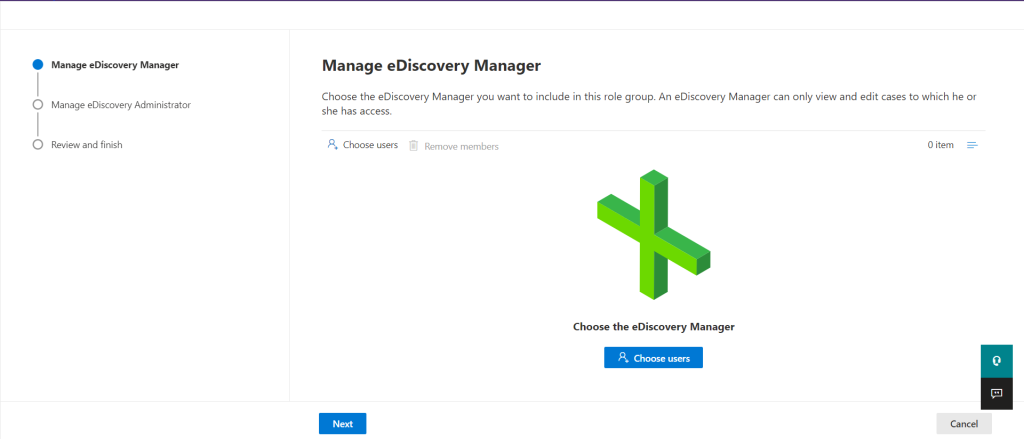
- Find your account and add it to the list.
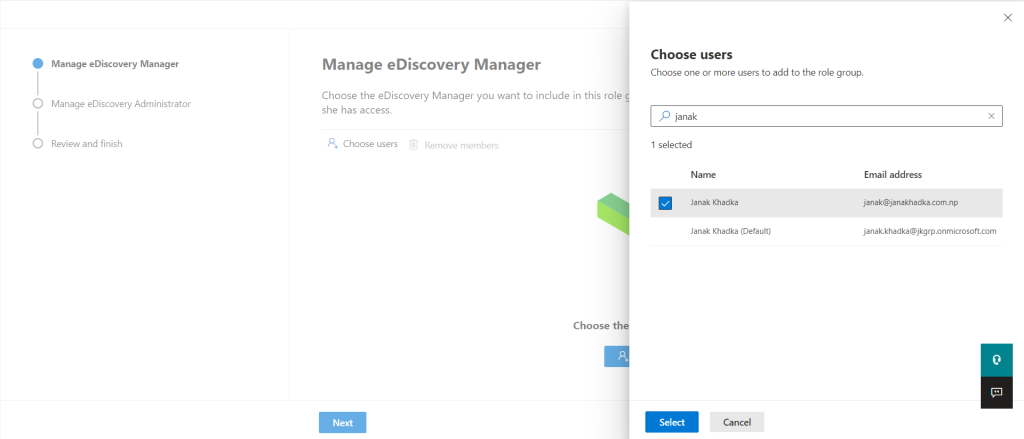
- Click on Select -> Next -> Save to save the changed settings.
We have now the proper permissions to start a Content Search and export an Microsoft 365 mailbox to PST. After adding or removing users to a role group it could take several minutes for the change to take effect. Sometimes you will need to log out of the admin center and log back in.
Microsoft 365 Mailbox Export to PST
To export a mailbox out of Microsoft 365 we first need to create a Content Search that will collect all the mail of the specified user as per our search criteria. Then we can export the result to a PST file with the eDiscovery Export Tool.
Note
As I mentioned earlier, only the browser Microsoft Edge is supported to download the eDiscovery Export Tool.
There are browser extensions available for Chrome and Firefox that solve this issue and allows you to download and use the eDiscovery Export Tool, but still I suggest you use Microsoft Edge for the smooth performance.
For Chome : Meta4 ClickOnce
For Firefox : Breez ClickOnce
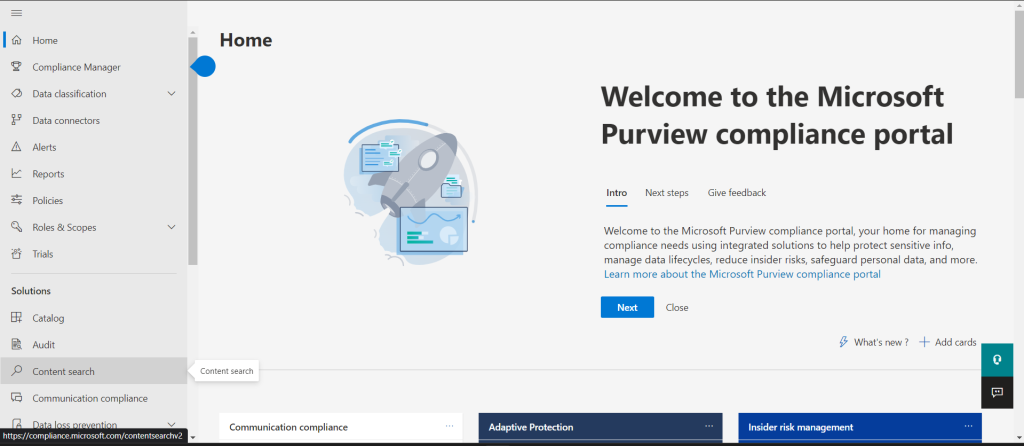
- First of all, open Microsoft 365 Purview Center (Microsoft 365 Compliance Admin Center)
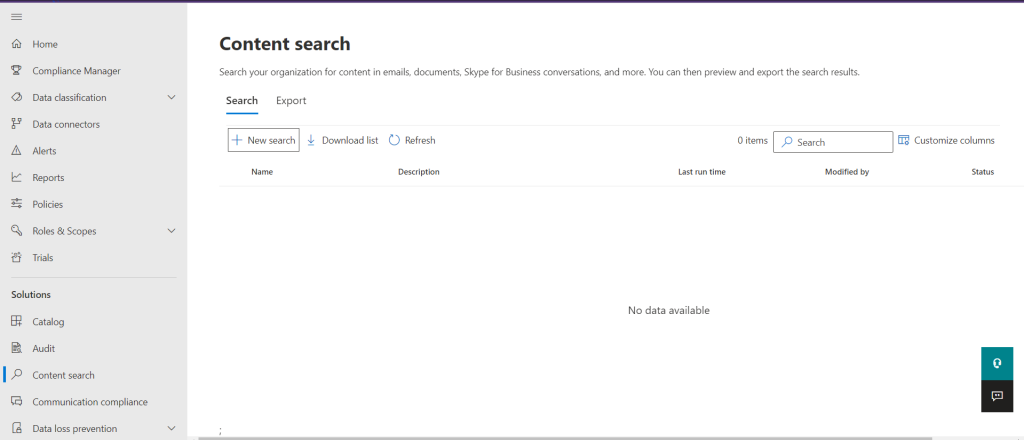
- In the left menu, click on Content Search
- Click on New Search
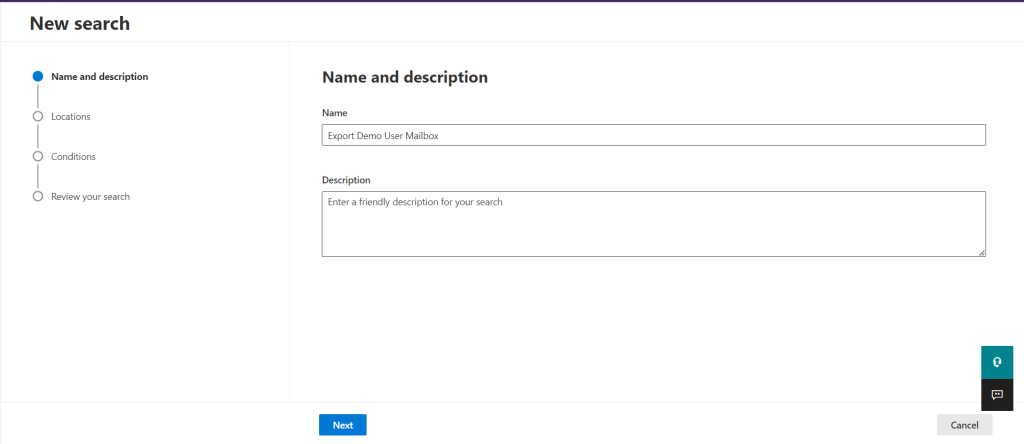
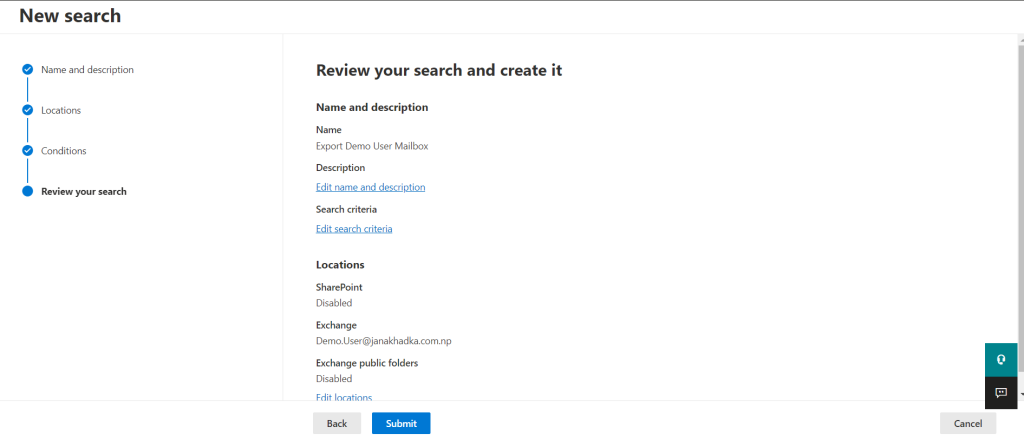
- Give your content search a recognizable name and description and click Next. This helps you later with identifying the correct content search.
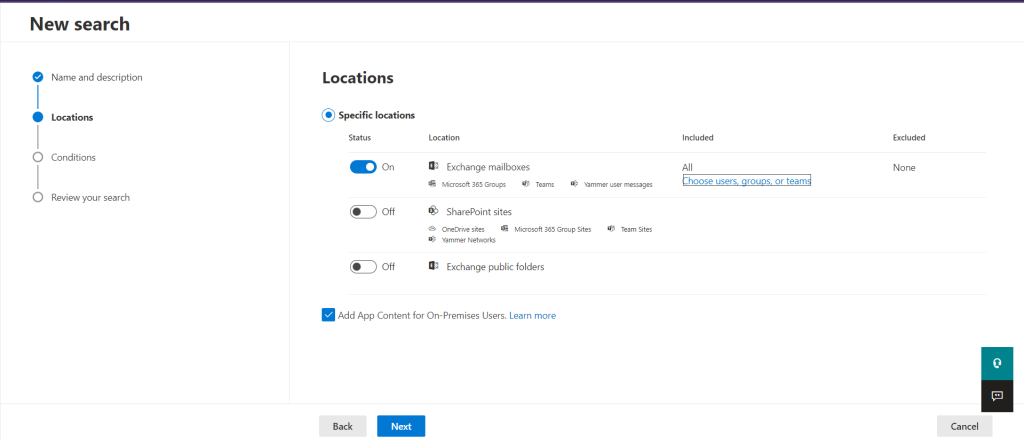
- To export a mailbox, turn Exchange Mailboxes on in the Locations page and click on Choose users, groups, or Teams option.
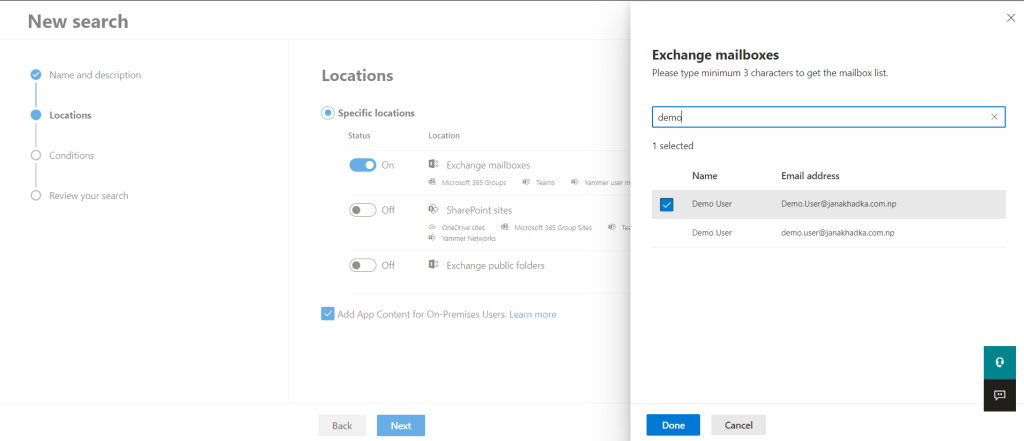
- Select or search for the correct user you want to export mailbox for and click on Done. And click on Next to continue to the Conditions.
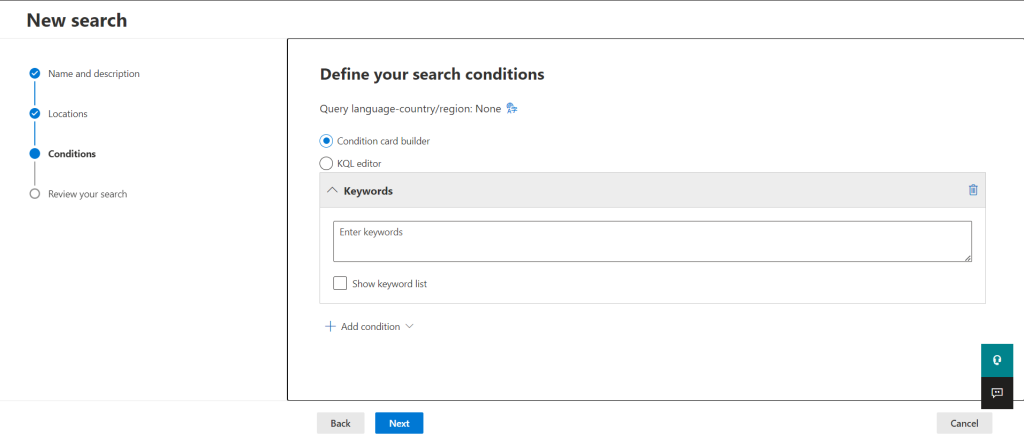
- Since we want to export entire mailbox, so we can leave the search conditions empty. The search conditions section is very powerful and allows you to search for emails based on different criteria, hence if you need it in future, you can make changes here.
Click on Next.
- Review your Content Search and click Submit to start it.
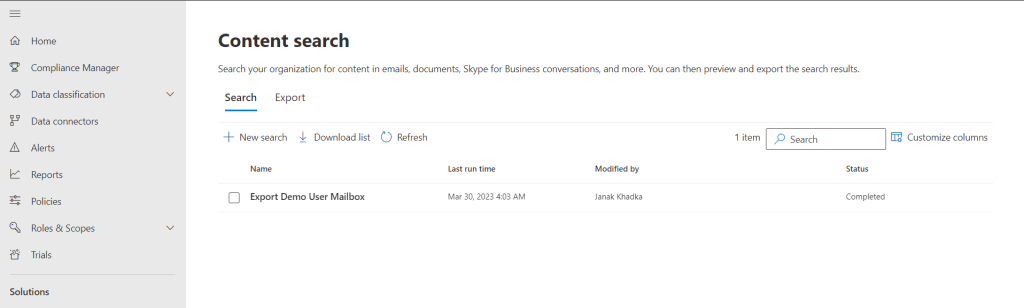
- Depending on the mailbox size it can take a couple of minutes to complete the content search. Wait for the status to change to Completed in the Content Search page. (Click Refresh occasionally to update the status)
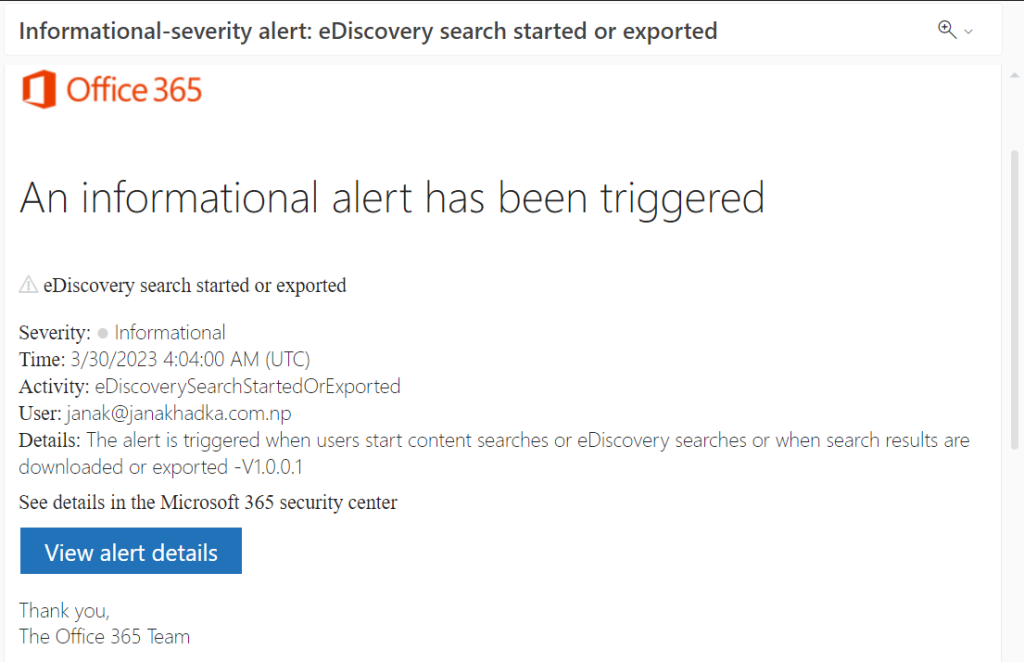
Note: When you run a content search you may get an email alert like the one below.
- Once the content search status changed to completed, click on it.
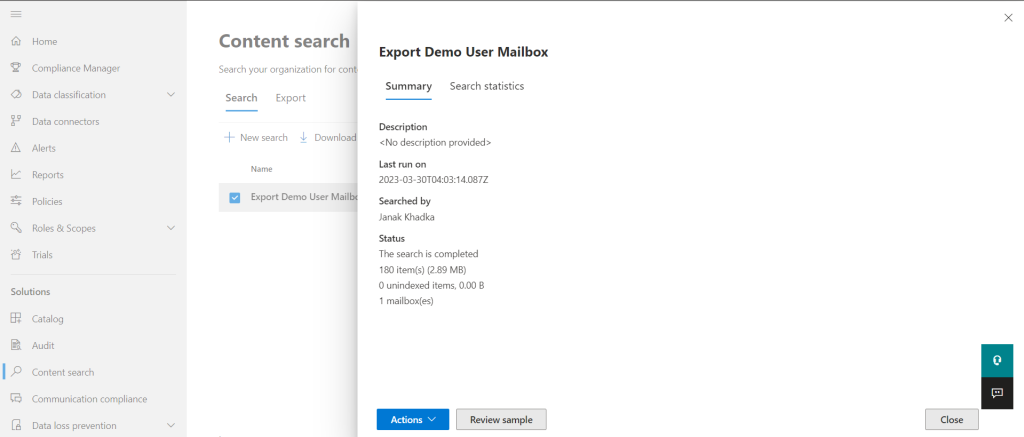
- Click on Actions and chose the Export Results option.
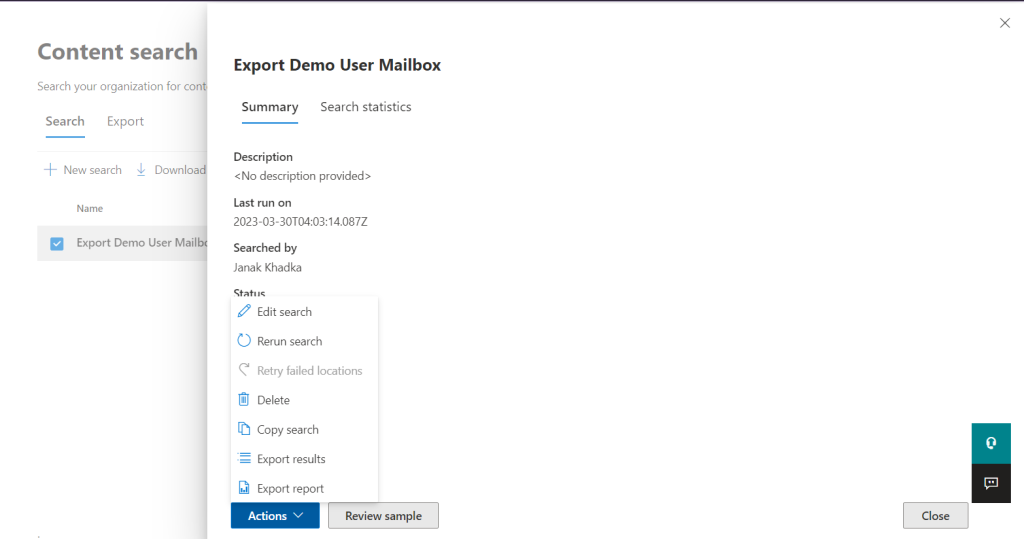
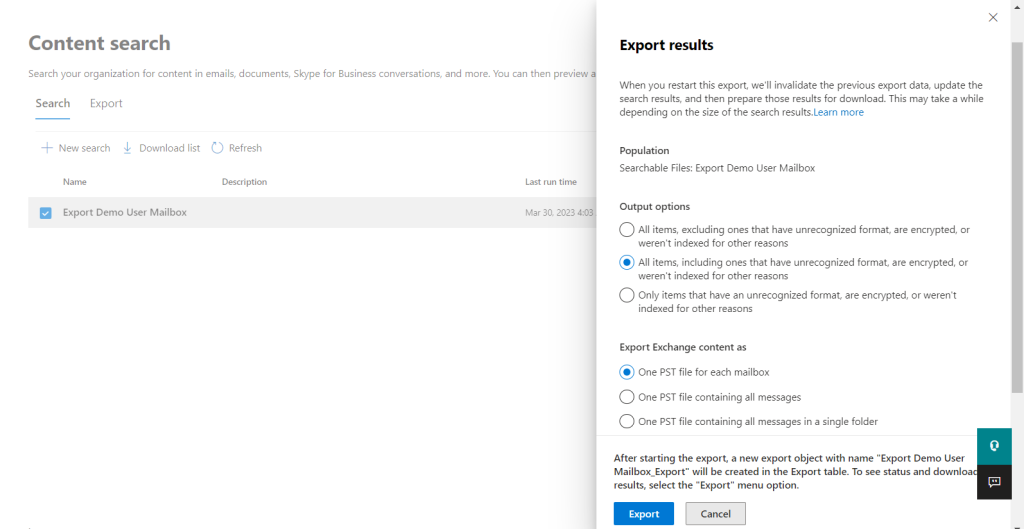
- We can now select what and how we want to export our mailbox.
–> select Output options as All items, including ones that have unrecognized format…
–> select Export Exchange content as One PST file for each mailbox.
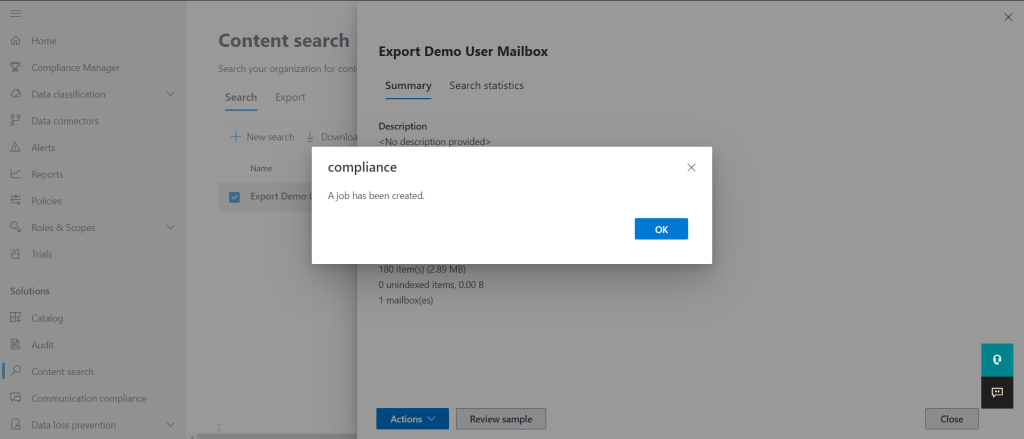
Click Export to start the export and then click on OK.
Again, it can take few minutes for the download file to get ready.
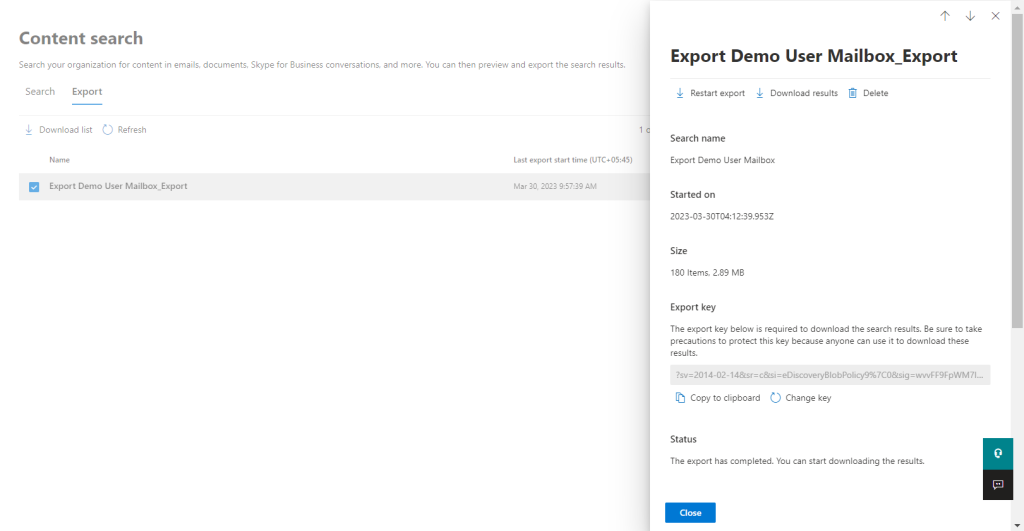
- Open the Export tab in the Content Search page and select the export job just created to view the status.
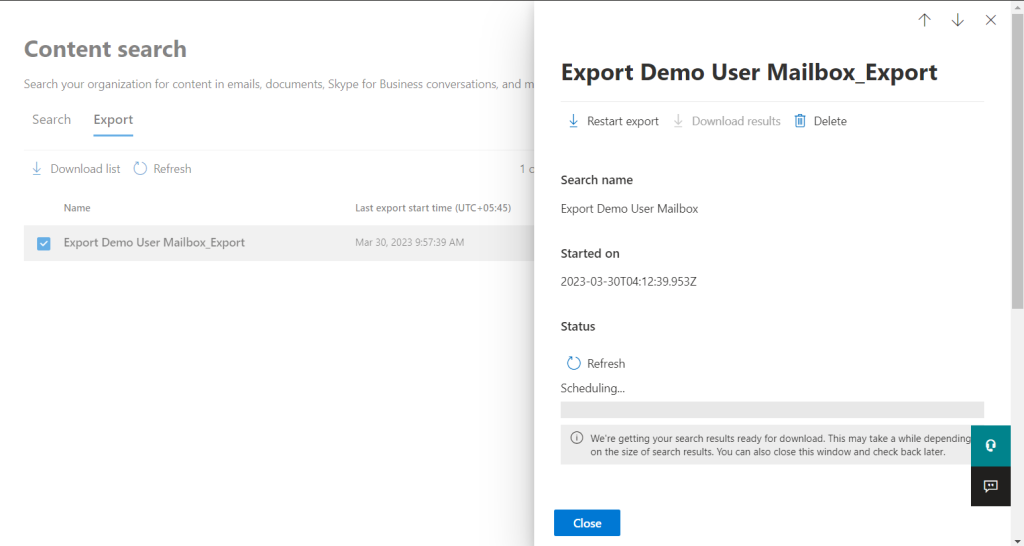
- Once the export job status changed to completed, copy the Export key from the bottom which will require you later to download the PST. Click on Download results.
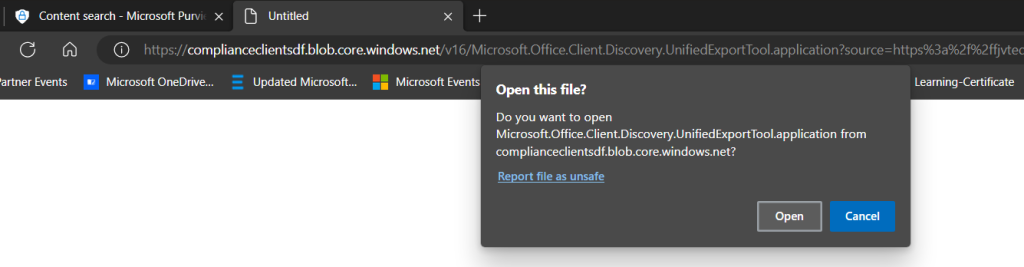
- A new tab will open that will download the eDiscovery Export Tool. Click Open in the security warning.
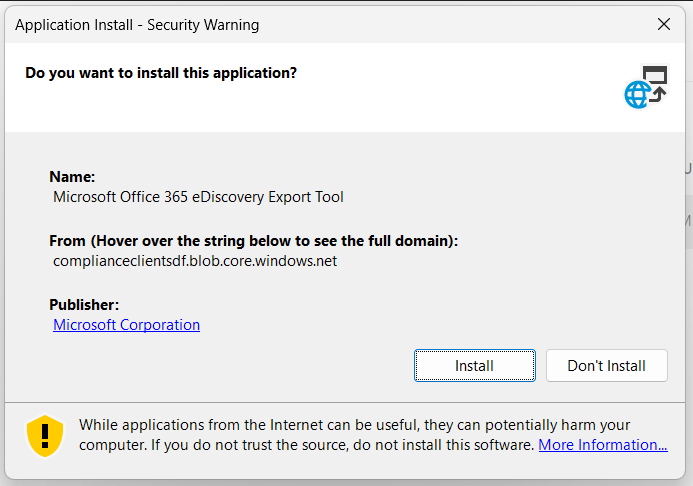
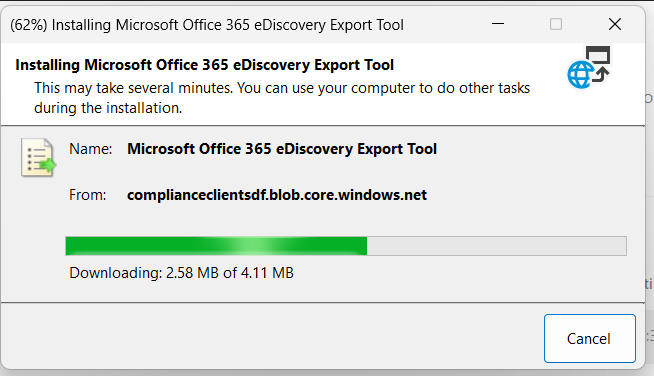
- If you’re using this eDiscovery Export Tool, it will prompt you for the installation. click on Install, it will then start installation process. (This will be the first time only, from the next time, you will directly go to the step 17 from step
- 15.
Once the installation completed, it will open the tool.
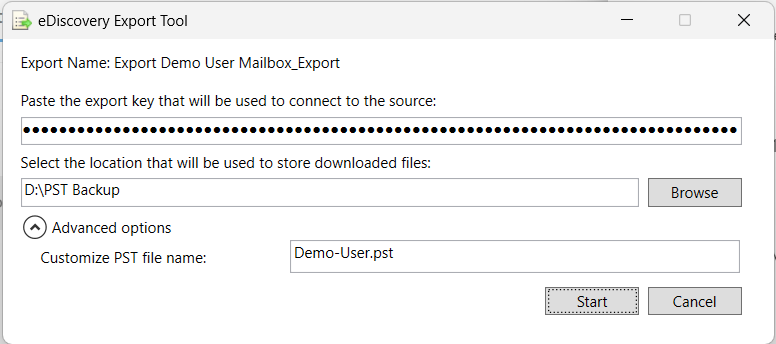
- You will then be prompted for the export key and location to download the file. Paste the export key you’ve copied in the step 14, enter or browse the location for your PST to download and click on Advanced options to give a suitable name to PST file. Click on Start, then the download will begin.
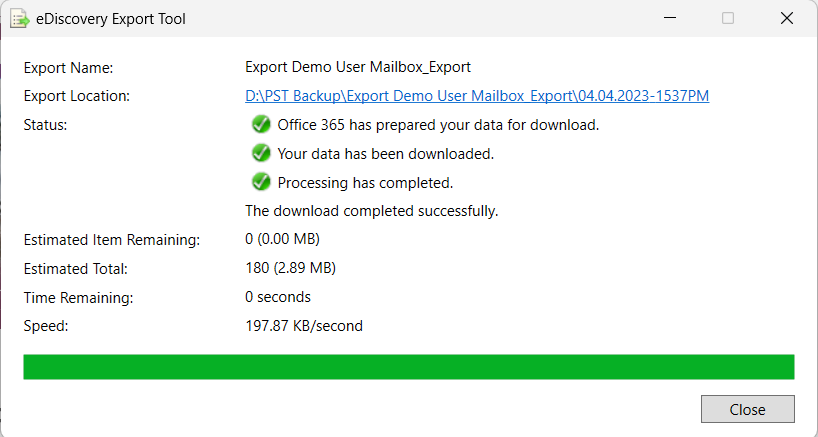
- Depending on the size of the mailbox, the download can take some time. Wait for it to
finish. You can now get your PST file in the location that you specified.
You can also use these steps to download multiple mailboxes at once. Just select multiple users or mailboxes at step 6 and makes sure that you select One PST file for each mailbox in step 12.
Er. Janak Khadka